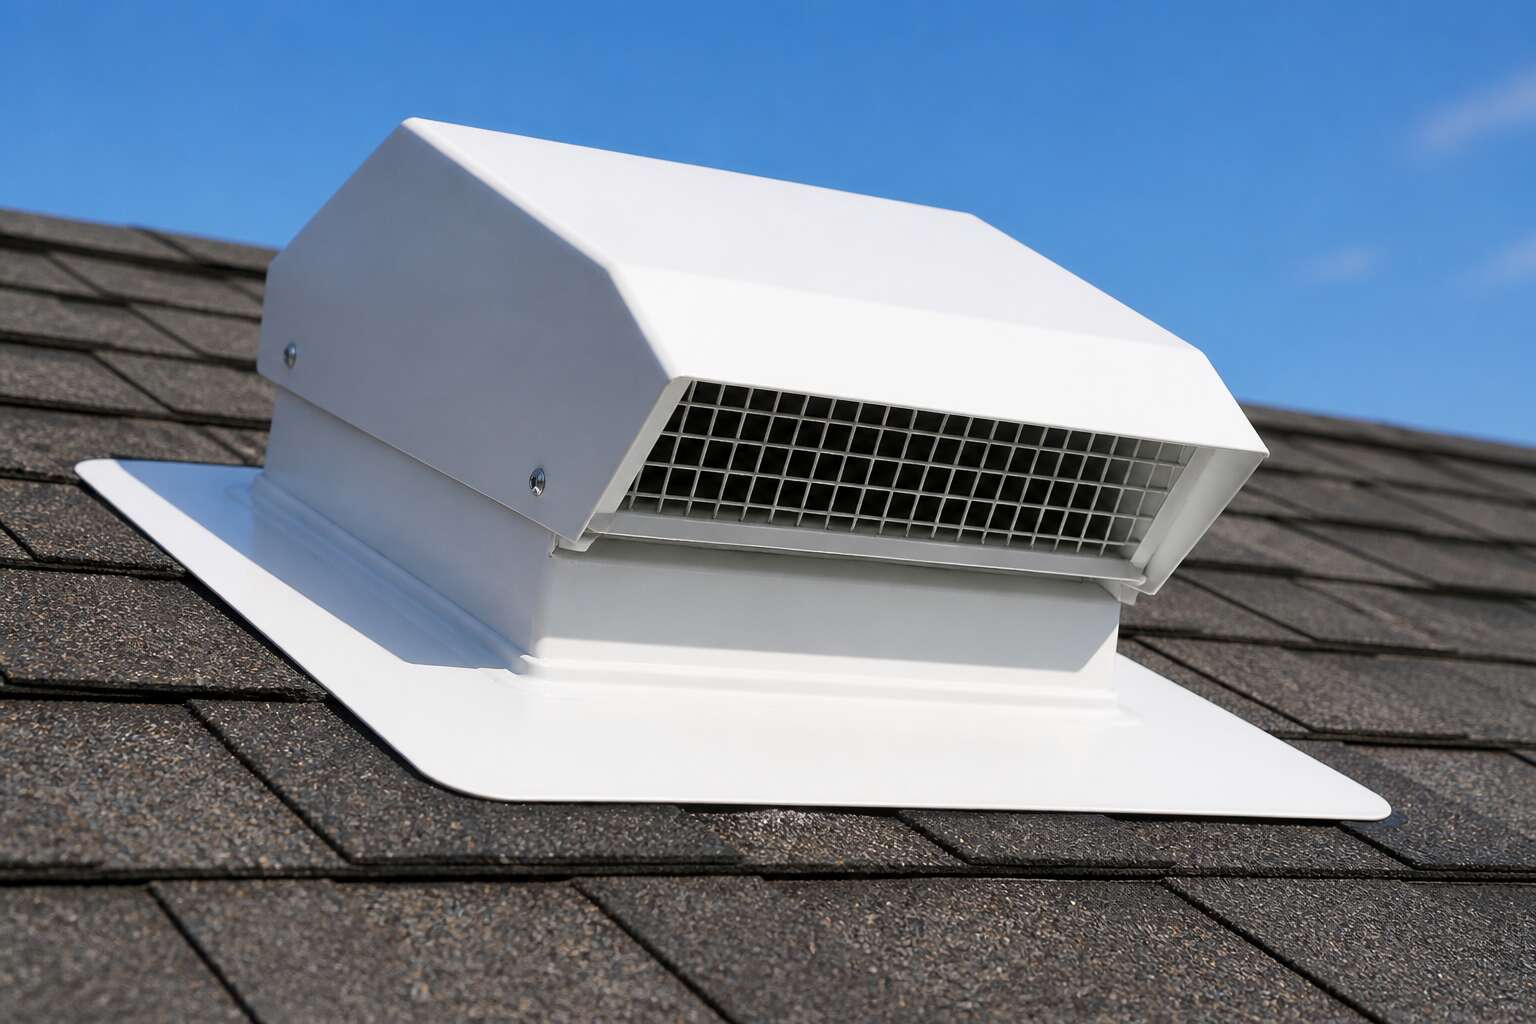
The Role of Flanges in Roof Ventilation
Preventing Water Infiltration
Wind driven rain finds every weakness on a roof. A roof vent with flange acts as the first barrier against that intrusion. The flange is the flat base that sits flush against the roof surface. Installers secure it with fasteners, creating a continuous seal. Water hits this metal or plastic edge and slides away.
For a roof vent with flange, the shape matters as much as the material. A proper design includes an upturned edge or a stepped profile. These features force water to change direction. I have inspected many installations where the vent cap was fine, but the flange had lifted due to poor fastening. That small gap turned a functional vent into a leak source!
A flange’s effectiveness depends on three factors:
- the pitch of the base relative to the roof slope
- the quality of the sealant used at the edges
- the fastening pattern that holds it down
Enhancing Wind Resistance
The wind does not negotiate. It pushes at every exposed edge, and a roof vent with flange must hold its ground. The flange’s flat profile transfers uplift forces across a wider area, preventing the vent from being torn away. Fastener spacing determines how well that force distributes. I have inspected flanges that rippled under pressure simply because the screws sat too far apart.
A well designed flange also deflects airflow. The raised edge breaks the airflow before it hooks underneath the vent. Consider these factors when assessing wind performance:
- the stiffness of the flange material
- the depth of the upturned edge
- the number and placement of fasteners per side
Wind resistance depends on geometry and material thickness combined. In coastal South Africa, that distinction matters every storm season.
Sealing Around Irregular Roof Surfaces
Corrugated iron dominates South African roofs, and every sheet ends in a raised ridge that can defeat an unyielding vent base. A roof vent with flange must follow that topography closely. The flange wraps around the curve of each rib and presses into the troughs rather than sitting loosely on top. This requires a balance of flexibility and tension.
Too soft a flange droops into the gap, losing surface contact. Too hard a flange bridges the ridge, leaving a void underneath. The material’s Shore hardness value matters more than its thickness in this application.
I have tested flanges on old asbestos roofs and modern steel panels. The ones that reseal after bending are worth the premium. They maintain contact point by point, without excessive sealant. The flange’s role in ventilation sealing is to match the roof’s imperfection.
Exploring Flanged Vent Styles
Static Vents with Pre-Installed Flanges
The highveld has a way of serving up four seasons in a single afternoon, so a static vent that just sits there is often the smartest piece of engineering on your roof. These units with a pre-installed flange skip the circus act of balancing a loose base while aligning flashing. A roof vent with flange attached at the factory means one less thing to misalign when the wind starts complaining.
The pre-installed flange is essentially a flat, integrated skirt that mates directly to the deck. This setup is particularly valuable for metal roofs, where screw placement and sealant work require a steady hand.
Consider what you are actually buying:
– A factory fitted flange ensures a consistent, uniform seal.
– Installation time drops because you are placing one component, not assembling three.
– The vent body and flange remain perfectly square to each other, every time.
For a quick, dependable retrofit, the static vent with a factory flange is the workhorse. The pre-installed unit acts as a single, cohesive piece, which simplifies the entire installation process. Just ensure your cut-out dimensions are accurate before you commit.
Powered Roof Ventilators and Flange Designs
When the heat in a Highveld attic becomes oppressive, a powered ventilator answers with force. A roof vent with flange integrated into the motorised housing changes the engineering priorities entirely. Unlike static units, a powered roof vent with flange must contend with vibration, torque and the constant whir of a blade spinning against the elements. The flange acts as the structural anchor, preventing the motor housing from twisting loose over decades of service.
Common flange designs for powered units include:
- A rolled edge flange that sheds water without disrupting airflow
- A flat aluminium flange for direct screw-down on corrugated iron
- A raised lip flange that keeps pooling water away from the motor housing
The motor’s weight demands a flange that distributes load evenly across the roof deck. A mismatched flange will transmit every wobble into the living space below. I have seen poorly specified units fail within a single rainy season, and the culprit was never the motor. It was always the flange.
Turbine Vents with Built-In Mounting Bases
Turbine vents with built-in mounting bases offer a different philosophy. The flange is the foundation, not an afterthought. As the turbine head spins, the base must absorb the rotational energy without transferring it to the roof structure.
The built-in mounting base creates a single unit that sits directly on the roof deck. This eliminates the gap between vent and flange that often collects debris. For South African roofs, where the sun beats down and thunderstorms arrive without warning, this matters.
- Some bases use a continuous ring for even weight distribution.
- Others use a segmented base for roof pitch variation.
- A few incorporate a raised lip to keep water away.
The turbine and base must work as one assembly. A poorly matched base causes the turbine to wobble. The roof vent with flange must be specified as a complete system. A roof vent with flange mismatched to the turbine will fail silently, before the first rain arrives.
Material Options for Flange Construction
There is a quiet gravity in choosing the flange’s material. Galvanised steel endures the African sun, but rust finds its seams. Aluminium offers lightness, yet bends under hail. Copper ages with a green patina, almost beautiful, but costly. For a roof vent with flange, the metal must match the roof’s temperament.
- Powder coated steel for coastal salt
- Stainless steel for industrial zones
- Zincalume for inland heat
Each style, from flat to stepped, changes how the vent sits. The flange’s thickness dictates its silence during a storm. I have seen thin flanges warp within a season. The right material is not an accessory. It is the difference between a whisper and a scream.
Low-Profile vs. Raised Flange Profiles
Look at a roof from the pavement and you will notice how the flange changes the vent’s appearance. A low profile flange sits flat against the surface, almost invisible, making it a quiet choice for modern developments with strict aesthetic rules. Raised flange profiles stand taller, creating a visible collar around the vent! That extra height matters when roofing material is thick or uneven. I once inspected a farmhouse near Bloemfontein where a raised profile saved the seal from constant friction with corrugated iron. For a roof vent with flange, the profile determines how much weather the flashing must resist. Three conditions separate them in practice:
- Roof pitch and water runoff speed
- Height of the surrounding roof material
- Expected wind uplift in your region
Low profile suits gentle slopes. Raised profile handles the aggressive sun and sudden hail that South Africa delivers to every building.
Installing a Flanged Roof Vent Successfully
Tools and Safety Gear Required
The gap between a roof that breathes and one that leaks is measured in millimetres. Fitting a roof vent with flange demands respect for that margin, and that respect begins with the right kit. You cannot improvise a reliable seal with a butter knife and hope.
Your tool roll should contain the essentials:
- A sharp utility blade for cutting shingles
- A reciprocating saw for the decking
- A caulking gun and sealing compound
- A drill with a hex driver for the flange screws
A chalk line snaps the cutout square before you cut. Work gloves and a dust mask protect you from fibreglass shards. The roof itself is the second enemy. Wear non-slip boots with soft soles, use a safety harness anchored to a ridge hook, and secure your ladder with a stabiliser. A roof vent with flange is only as good as the hands that fit it, and those hands need to stay attached to their owner.
Preparing the Roof Opening
Cutting into a roof demands precision. Before you lift a saw, I recommend confirming the attic layout. Measure the vent base and mark its outline on the decking. A roof vent with flange needs a clear bay between rafters, so check for obstructions:
– Locate rafters and trusses directly beneath the marked area
– Confirm there are no cables, pipes, or ducting in the path
– Check the decking thickness and condition
Snap a chalk line to keep the cutout square. Drill a pilot hole at each corner, then cut with a reciprocating saw. Keep the blade vertical. The opening should be slightly smaller than the flange footprint so the flange bears evenly on the timber. A roof vent with flange needs that flat, stable surface. South African roof decks are usually plywood or chipboard, and both require a clean cut. If the blade wanders, the seal will not seat correctly.
Applying Underlayment and Flashing
Most roof leaks trace back to flashing, not the vent itself. A roof vent with flange only performs when the underlayment is dressed correctly. I cut the membrane in an X pattern and fold each tab up beneath the flange skirt. This forms a continuous water shedding plane. No gaps. No exposed deck!
The flashing sequence matters more than most installers realise. Work from the lower edge upward. For a roof vent with flange, the side flashing must sit over the underlayment but under the shingle course above. Nail spacing follows the manufacturer’s diagram exactly. A missed fastener invites wind uplift later.
A typical tile roof follows this order:
- Set the vent base on the sealant bed,
- Dress the underlayment tabs over the flange,
- Secure the flashing skirt with approved fasteners,
- Reinstall the surrounding tiles.
South African summers deliver brutal UV and sudden storms. A flanged vent that skips this step is a future leak.
Securing the Flange and Sealing Edges
A roof vent with flange often fails at the edge, where sealant meets metal. That narrow strip carries the entire water shedding duty. I press the flange flat against the deck and lay a continuous bead of sealant, working slowly around the corners so the line never breaks.
Fastener placement requires equal care. Drive each screw through the flange’s pre-marked points, then cover every head with a dab of sealant. A roller sets the butyl tape evenly across the edge seal.
- Lay the flange into fresh sealant
- Secure the perimeter fasteners first
- Seal each fastener head individually
That order prevents the flange from lifting during a Highveld thunderstorm. A roof vent with flange secured at its edges will outlast the shingles around it.
Avoiding Common Installation Mistakes
Nearly seventy percent of flanged vent failures trace back to installation day, not to the product itself. A roof vent with flange is only as good as the hands that fit it. I have seen properly manufactured vents ruined by a single misplaced screw.
The most repeated mistakes share a similar pattern. Contractors rush the preparation and treat the vent like a decorative cap rather than a structural element:
- An unlevel opening that leaves the flange twisting against the deck
- Fasteners driven past the surface, warping the metal
- Wrong orientation for the prevailing wind direction
Each error is preventable with a slow, deliberate approach. The pitch must be checked, the slope confirmed, and the fit tested before any fastening begins. That discipline is what separates a dry attic from a costly repair.
Preserving Performance Through Routine Maintenance
Seasonal Inspection Checklist
In the Highveld’s hail season, a single overlooked crack can undo years of protection. A roof vent with flange demands more than passive trust. Seasonal maintenance turns anxiety into assurance.
Walk the roofline twice a year. Check for UV degradation, loose screws, and weather staining. Clear debris from the flange skirt. Listen for rattles during wind!
- Inspect silicone seams for separation
- Torque fasteners to spec
- Verify gasket pliability
Document each visit. Compare photos from six months prior. Small shifts in alignment or colour signal premature fatigue. Catching these early prevents expensive interventions.
Cleaning Debris from Flange Seals
A roof vent with flange depends on clean contact surfaces more than most homeowners realise. Leaves, acacia pollen, and Highveld dust accumulate beneath the flange skirt. This organic layer traps moisture against the seal itself. Over time, dampness softens the gasket compound and opens micro-gaps that invite leaks.
Clearing debris takes minutes, not hours. Work a soft nylon brush along the flange edges to lift compacted material. Follow with a damp microfibre cloth. Avoid pressure washers entirely; they force water under the flashing and into the decking.
- Check for moss or lichen forming on the flange surface
- Remove spider webs or insect nests blocking airflow
- Verify that drainage notches remain free of silt
Consistent cleaning preserves the elasticity of the seals and keeps the metal flange free from corrosive buildup. Your roof vent with flange performs best when its perimeter stays dry and unobstructed.
Identifying Rust or Corrosion Early
Rust is a quiet antagonist, one that often begins as a blemish and ends as a structural compromise. A roof vent with flange endures constant exposure to thermal shifts and airborne moisture. When the protective coating on the metal wears thin, oxidation sets in. I look for pinpoint bubbling beneath the paint layer or rust-colored streaks trailing down the shingles. These early warnings signal that the sacrificial layer has failed.
The inspection should be tactile. Run a gloved finger along the flange edges and the fastener heads. Any roughness indicates the metal is no longer passive.
– Check the valleys where the flange meets the roof deck for discoloration.
– Probe the screw heads for orange residue, which suggests moisture ingress.
– Examine the base metal where the finish has chipped from hail impact.
Early identification allows for localised treatment before the corrosion spreads to the seal bed. A roof vent with flange that retains its structural integrity also retains its weathertight bond. Routine maintenance of this kind is less about labour and more about vigilance.
Re-Caulking and Refreshing Sealant Layers
The sealant layer on your roof vent with flange is a working component, not a decorative bead. It flexes with the roof, sheds water, and seals the gap against air intrusion. But it does not last forever. Heat and rain degrade its molecular structure. I have seen sealant that looked intact, yet peeled away with a gentle tug.
Regular re-caulking preserves performance. Remove the old compound, clean the substrate, and apply a fresh bead of polyurethane sealant.
- Look for cracks that run parallel to the flange edge.
- Feel for tackiness, which indicates incomplete curing.
- Watch for separation where the sealant meets the shingle.
A refreshed sealant layer keeps the roof vent with flange stable. It blocks capillary action and stops moisture from tracking under the metal. Do this every two years, or after a severe hailstorm. The roof vent with flange then continues its quiet work, holding firm against the elements. Your home stays dry, and the structure stays sound.
Extending the Lifespan of Your Ventilation System
Very few homeowners think about their roof vent with flange until something goes wrong. A ventilation system that receives steady attention will serve for decades, while a neglected one fails quietly and early. I have seen both outcomes on the same street, same roof pitch, same weather.
Routine maintenance requires attention to the parts of the home you cannot see. The roof vent with flange carries warm, moist air out of the attic every day. That constant work wears on the seal, the flashing, and the moving parts. Attention slows that wear.
The benefit of maintenance compounds over time. Each inspection builds on the last, catching small changes before they become large ones. Homeowners who stay involved with their ventilation system avoid sudden failures and preserve the value of the roof as a whole. The vent rewards this vigilance with years of dependable service!
When to Call a Professional Roofer
A roof vent with flange performs best when its care is consistent, but consistency has limits. Most homeowners can handle visual checks and light cleaning. The moment you spot a lifted flange edge or a seal that keeps failing, this is the point where you call a professional roofer. Water will find the opening otherwise. Heat and weather stress the flange every day.
Professional roofers carry tools and training that most homeowners lack. They can determine whether the roof vent with flange needs re-seating or full replacement. They also catch problems in the surrounding shingles that you might miss.
Some signs demand immediate attention:
- Visible daylight around the vent base
- Nails backing out along the flange
- Persistent leaks despite fresh caulking
I have seen waiting turn a minor repair into a costly one. A quick call preserves the roof and the ceiling below it!
Selecting the Ideal Flanged Vent for Your Building
Matching Vent Type to Roof Pitch
A vent that looks fine from the ground can leak within a year if the flange fights the roof’s angle, says a veteran roofer from Johannesburg. Selecting the ideal flanged vent for your building starts with your roof’s pitch. A roof vent with flange must sit flush against the slope, or gaps invite moisture. Low-slope roofs suit static vents with pre-formed flanges matching shallow angles. Steep pitches require taller profiles, like turbine vents whose flanges adapt to the sharper rise.
When pairing vent type to pitch, watch three things:
- Measure the roof’s angle at the ridge before buying any roof vent with flange.
- Choose a flange that matches the exact slope, not a universal one.
- Confirm the vent’s base allows clearance for underlayment on steep surfaces.
From inspecting farm roofs in the Free State, I have seen mismatched vents cause warped flanges and stained ceilings. Matching the type to the pitch is the difference between a home that breathes and one that leaks in every storm!
Considering Local Weather Patterns
A roof vent with flange that survives a Johannesburg hailstorm can fail within months on the Durban coast. Local weather patterns dictate everything from flange material to sealant choice, and South Africa offers a full range of climate extremes in a single country.
The Highveld brings intense UV radiation and thermal cycling. Coastal regions deliver salt spray and humidity. The Karoo adds dust and heat. Each condition stresses the flange differently.
- Coastal homes need corrosion resistant flanges with marine grade seals.
- Inland properties benefit from UV stabilised materials that resist cracking.
- High rainfall areas demand flanges with deeper drainage channels.
Storms approach differently across regions. The prevailing wind angle affects rain splash and pressure around the vent base. A roof vent with flange matched to local weather patterns performs through every season.
Understanding Code and Efficiency Ratings
South Africa’s National Building Regulations, SANS 10400, set the baseline for ventilation performance. Yet efficiency ratings go beyond mere compliance. A roof vent with flange that moves air effectively must also resist heat gain and prevent moisture transfer. The rated airflow, measured in cubic metres per second, only tells half the story.
When selecting, check the flange’s compatibility with your roof profile. The manufacturer’s efficiency data assumes ideal installation. In practice, a poorly matched flange reduces airflow by surprising margins. Look for the SABS mark and verify the test conditions match your region.
- Compare the net free area against your attic volume.
- Confirm the flange’s fire rating aligns with your roofing material.
- Check whether the rating covers wind-driven rain intrusion.
Code compliance protects you from legal liability, but efficiency ratings protect your energy bills. A roof vent with flange that meets both requirements will serve your building faithfully for decades.
Comparing Ventilation Flow Rates
A typical flanged ventilator moves only a fraction of the air its packaging claims, which is why comparing ventilation flow rates matters before you buy. I have seen installations where a high priced unit shifted less air than a budget model because the flange throat was too narrow. The numbers on the box mean nothing if the flange restricts the stream.
Measure the effective opening, not the advertised diameter. South African summer heat punishes attics that rely on undersized vents, so a roof vent with flange must be matched to your specific roof volume and pitch. When I compare units, I use the net free area rating as my first filter, then the pressure drop curve.
- Check the free area in square centimetres, not just the blade span.
- Match the flange size to your duct diameter before sealing anything.
- Verify the flow rate at a realistic wind speed.
That approach has never failed me. A roof vent with flange that passes this scrutiny will perform consistently through our hottest months.


0 Comments