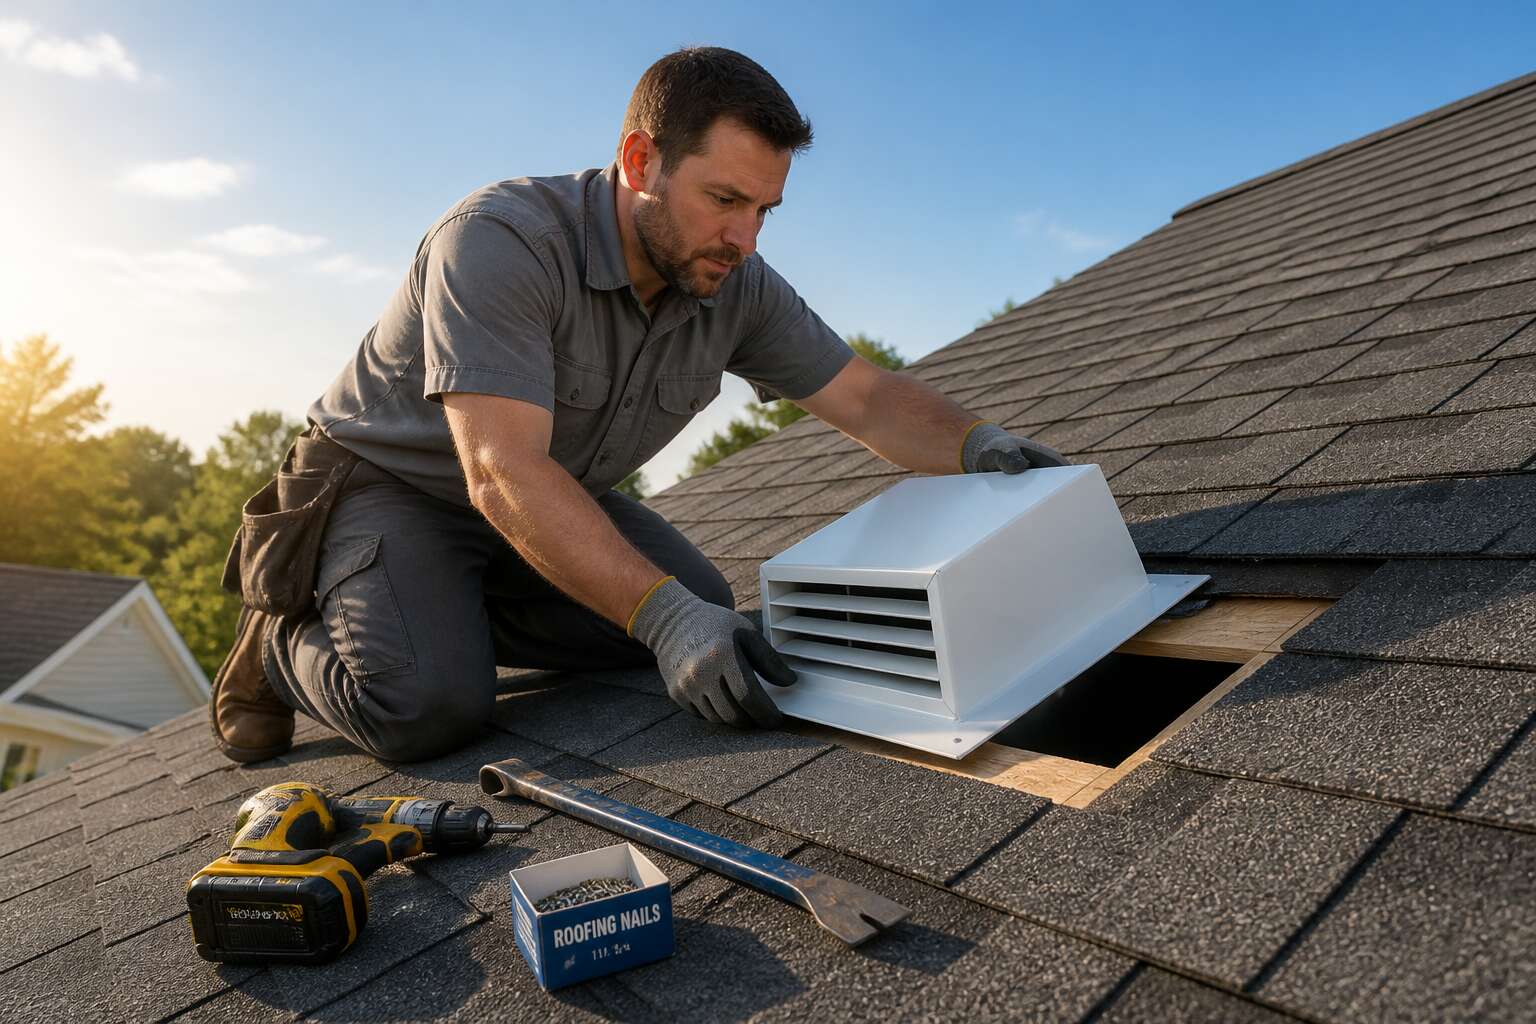
Signs Your Home Needs Better Attic Ventilation
Moisture stains and mold growth on roof decking
That dark watermark on your roof decking is not decorative; it signals structural trouble. When moisture stains and mold growth appear together, your attic ventilation has already faltered. Stagnant air traps humidity from daily living, allowing moisture to settle and rot timber over time.
Before you attempt a roof vent diy project, inspect the decking closely. Mold appears as grey or black patches; water stains leave jagged rings. These signs mean airflow cannot dry the wood. Check for:
- Damp spots that stay dark after a sunny week
- Flaking paint on roofing nails
- A sour smell that lingers in the attic
Roof vent diy work, done properly, clears that trapped moisture and protects the timber. The fix is straightforward, but the warning is unmistakable!
Excessive heat buildup making upstairs rooms uncomfortable
On a sweltering Highveld afternoon, an attic can hit 70 degrees Celsius while your living room sits at 30. That trapped heat radiates down through the ceiling, making upstairs bedrooms unbearable by evening.
If you feel warmth radiating from the ceiling after sunset, the air in your roof space is not moving. Effective ventilation maintains a steady airflow that carries heat away. Without it, the attic retains heat all night. Before considering a roof vent diy route, look for these signs:
- Hot air rushing out when you open the hatch to the roof space
- Air conditioning units upstairs running all evening without real relief
- Roof sheeting too warm to hold your palm against from inside
That heat also accelerates wear on roofing materials themselves. A well positioned roof vent diy install, facing the prevailing wind, flushes the hot air out before it settles into the rooms below.
Ice dams forming along the eaves during winter
Ice dams are a wintertime signal that your attic is failing at its job. When warm air escapes into the roof space, it melts snow on the upper slope. That water runs down and refreezes at the cold eave, forming a dam. It catches many homeowners off guard!
The signs are hard to miss:
- Icicles hanging from the gutter line while the rest of the roof stays snow-covered
- Water stains appearing on interior walls near the eaves
- Ice building up behind the gutter, lifting it away from the fascia
Each of these indicates the roof deck is staying warm when it should stay cold. A roof vent diy installation that flushes the attic with outside air equalizes the temperature and breaks the cycle. Without that airflow, the freeze thaw pattern repeats every night.
Choosing the Right Ventilation Approach for Your Home
Static roof vents for straightforward, low-cost projects
Choosing the right ventilation approach for your home begins with balancing ambition against effort. A roof vent diy install with static vents is the most direct entry point, offering reliable airflow without motors or electricity. In South Africa, many homeowners appreciate this simplicity for outbuildings and additions.
Static roof vents suit straightforward, low-cost projects where a clear weatherproof seal matters more than aesthetic flair. You must consider roof pitch, prevailing wind direction, and ceiling layout before cutting any openings. A basic rule: space the vents evenly along the ridge or high on the gable to allow warm, humid air to escape naturally. This approach keeps installation time short and materials minimal.
Soffit and gable vent combinations for balanced intake and exhaust
Proper airflow depends on a balanced system, and many South African homes miss this point entirely. Soffit vents pull cool air low, while gable vents release warm air high, creating a steady draft that protects rafters and insulation. For a roof vent diy project, pairing these two vent types often outperforms a single ridge unit because the crossflow follows natural pressure differences.
Consider the orientation of your eaves and the gable wall before buying materials. A common mistake is fitting gable vents without soffit intake, which starves the system. This combination suits homes with simple roof lines and open attics, where the path from low to high remains unobstructed.
When a powered exhaust fan is worth the extra effort
Attics with low pitch and shelter from wind undermine passive vents entirely. In my work across South Africa, a powered exhaust fan earns its place when natural air pressure differences are simply too weak. The extra effort involves wiring, a thermostat, and a rain switch, but the payoff is consistent drying of rafters and insulation! For a roof vent diy project, match the fan capacity to your attic floor area. Use at least 1 cubic metre per minute per 10 square metres. Then weigh these signs.
- You hear flapping or whistling from loose vent covers even in calm weather.
- Thermal imaging shows hotspots forming near the ridge beam.
- Loose fibreglass particles drift from the insulation layer.
Each condition points to an extraction problem that a powered fan resolves. Choose this roof vent diy approach only when every passive option has been reviewed and found inadequate.
Mapping Out Your Installation Before You Climb Up
Measuring attic square footage to determine required vent count
A poorly ventilated roof can shorten its lifespan by decades, yet the true culprit often lies in an incorrect vent count. The attic square footage is the foundation for calculating passive ventilation capacity, and most homeowners only feel the consequence during the hottest summer afternoons.
Start by measuring the length and width of your attic floor. Multiply these numbers to get the square footage. For every 150 square feet of attic space, you need one square foot of ventilation. So, a 1,500 square foot attic requires 10 square feet of total vent area, split between intake and exhaust.
– Use a tape measure to record the exact length and width of the attic.
– Multiply the two measurements to determine the total square footage.
– Divide that number by 150 to calculate the required net free area in square feet.
This calculation is your roadmap. It determines the number of vents you need before any roof vent diy project begins, saving you from wasted effort and improper airflow.
Locating rafters and avoiding electrical or plumbing obstructions
Before you channel your inner mountain goat and scramble into the loft, map the terrain. Any roof vent diy project lives or dies by what you find up there, or more accurately, what you avoid.
Locating rafters is step one. Use a stud finder to mark their centres. This determines where your vent gets secured. Then scan for electrical cables and plumbing pipes. Drill into a live wire and you will have bigger problems than a stuffy bedroom.
- Mark rafter centres with chalk.
- Check for hidden cables near the decking.
- Confirm no pipes run through your chosen spot.
A little reconnaissance now saves a lot of patching later. The time spent mapping is cheaper than a sparkie’s callout fee, and it keeps the roof vent diy experience firmly in the satisfying column.
Choosing the ideal roof slope and placement for maximum efficiency
Choosing where your vent lands is a game of angles, not guesswork. A roof vent diy job demands a slope that lets hot air rise and escape without dragging rain inside. Ideal placement sits high on the roof, near the ridge, where the stack effect does the heavy lifting. Orient the vent to face away from prevailing winds in Cape Town or Durban, or you create a whistle instead of ventilation.
- Aim for the upper third of the roof pitch.
- Pick a spot clear of shade from trees or chimneys.
- Check the sun path, north facing slopes bake longest.
A poor angle turns your roof vent diy into a moisture problem. Match the slope to your climate, then lock in the placement. That is the difference between a vent that works and one that merely decorates the skyline.
Gathering essential tools, fasteners, and safety equipment
I need a hook that grabs attention without the usual clichés. A statistic or a sharp observation works best here.
—
Most roof vent diy failures happen before the first blade touches the shingle. The culprit is usually a rushed setup, where measurement and preparation take a backseat to the excitement of cutting a hole in your roof.
Mapping the installation on the ground saves time and prevents costly errors. Transfer your measurements directly from the attic, marking the drill points from inside. This method ensures you hit the exact spot you planned, not a guess from the outside.
You will need the right gear before climbing. A handful of common items covers most jobs.
- Cutting tools, such as a jigsaw or reciprocating saw, for the decking.
- Closed cell foam tape and a quality sealant for weatherproofing.
- A cordless drill, wrench, and a full box of approved roofing screws.
Consider your safety too. A harness anchored to a rafter is non negotiable on a steep pitch. Secure loose clothing and leave the work to a clear day. Rushing this step invites slips, damaged flashing, or a vent that leaks at the first storm. The roof vent diy project succeeds when the prep work is as solid as the finish.
Removing shingles carefully without damaging surrounding courses
Mapping out the installation on the ground prevents most roof vent diy mistakes. Transfer measurements from the attic first, marking drill points from below so the cut lands exactly where planned. This ground work saves time and spares the roof from unnecessary patches.
Shingle removal demands a gentle hand. Lift each tab with a flat bar, working from the top course downward and prying only the nails that block the vent opening. Highveld heat makes shingles brittle, and one careless pull cracks the surrounding course. The intact edges then receive new flashing, and every exposed fastener head gets sealed against the next storm.
Cutting the Opening and Mounting the Vent Base
Tracing the cutout template accurately onto the roof deck
Tracing the cutout template onto the roof deck demands a steady hand. A wobbly line means a leak later. For a roof vent diy project, this step separates weathertight from frustrating.
Before I commit the saw, I verify three details:
- rafter position relative to the template
- decking condition for soft spots
- clearance around existing nails
That audit saves a misaligned cut. I bore a starter hole just inside the line, then guide the saw without forcing it.
The opening dictates how the vent base mounts. Slow down.
Drilling pilot holes to prevent splintering and control the saw path
The pilot hole is where control begins. A 10mm drill bit bores through the decking cleanly, creating an entry point for the saw. From there, I guide the cut along the traced line without forcing the blade. The saw moves at its own pace.
Mounting the vent base demands the same discipline. The flange must sit flush against the shingles, and any gap will let water through. I drive the screws starting at the corners and working toward the middle, pulling the base down evenly.
Before the first screw, I verify:
- The base overlaps the cutout on every side
- The decking underneath feels solid
- The flange lies flat without rocking
The roof vent diy process rewards this patience. Once the base is seated, the opening is sealed.
Plunge-cutting the opening using a reciprocating or circular saw
The plunge cut is where roof vent diy projects go sideways. The pilot hole and traced line are ready. Now convince a reciprocating saw to cut on the mark. Set the shoe against the decking and let the blade tip work.
With a circular saw, tilt the blade guard and lower the spinning blade onto the marked corner. Keep the speed high and the pressure light. Roof decking is not forgiving, and neither is gravity.
The base follows the philosophy. It must sit on the shingles like it pays rent. Check the sealant bead before setting it down. Roof vent diy rewards deliberate movements. Confirm:
- The cutout edges are clean, not ragged
- No debris sits between the base and shingles
- The vent sits square to the ridge line
The rubber gasket compresses only when the flange presses it evenly. Uniform sealant squeeze-out means the base is seated properly.
Fitting the vent base flush against the roof deck
The opening needs more than a straight plunge cut. Use a jigsaw to square corners the reciprocating saw rounded. Work the blade along the marked line at medium speed. Clean edges matter because they determine how tightly the base seals against the decking.
Mount the vent base only after you inspect the cutout:
- Run a finger along each edge to feel for splinters or tears
- Vacuum all debris from the opening and surrounding shingles
- Lay the base dry to check square alignment with the ridge
Set the sealant bead and lower the base. Pressure should spread the rubber gasket evenly. A rocking base means the opening is oversize or the deck is uneven. This roof vent diy step separates careful work from hurried fixes.
Securing flashing around all four edges for a watertight seal
With the opening squared and the base seated, the flashing becomes the primary water barrier. The base alone sheds water only where it seals; the flashing directs runoff around the seams.
For a proper roof vent diy installation, press the rubber gasket firmly against the deck before driving the first screw. If the base shifts, loosen and reset rather than forcing fasteners into a crooked frame. On a hot South African afternoon, shingles are pliable enough to let the flashing tuck beneath the course above.
- Lay the upper flashing edge under the shingle course above
- Run a continuous roof cement bead along each side flange
- Drive corrosion-resistant screws from the lower corners upward
Work from top to sides to bottom in this roof vent diy. A gap at any corner becomes a channel for driven rain. Correct flashing makes the base part of the roof rather than an object resting on it.
Fastening the vent cap and hood tightly to prevent rattling
Once the pilot holes are drilled, follow the template with a sharp blade. Keep the saw shoe flat against the deck to avoid binding. After the cut, clear the debris before seating the base. A clean edge lets the vent sit level.
Mount the base and check the gap on all sides. Press down evenly so the rubber gasket compresses. Then fasten the cap and hood. Tighten screws until snug, but stop before stripping the threads. A loose hood will rattle on windy nights.
- Hand thread each screw first.
- Tighten in a crisscross pattern.
- Recheck after a week of weather.
This roof vent diy step takes patience, not force.
Sealing and Weatherproofing the Finished Vent
Shingling over the bottom and sides of the vent base
A roof vent diy project only succeeds when the final details receive the same care as the initial cuts. Sealant applied to the seams and edges closes the gaps that wind-driven rain exploits. South African roofs face intense sun and sudden downpours, so the sealant choice matters. A polyurethane based product tolerates thermal expansion better than cheaper acrylics, reducing the chance of cracks appearing after a few seasons.
Shingling over the bottom and sides of the vent base is the final layer of defence. New shingles cut to overlap the vent base channel water over the flashing and into the gutter system. Keep the nail line high enough to avoid penetrating the flange. Every nail must land in solid roof decking, never into a gap or edge. The vent and flashing are married to the roof at this point, and removing a mistake means cutting these materials free.
For a roof vent diy project, this step determines whether the job holds or leaks. A proper shingle pattern takes extra time, but it keeps the structure honest and dry through the years.
– Press each shingle flat to avoid bubbles.
– Check the reveal between courses for a clean line.
– Work in small sections to keep the adhesive tacky.
A neat job sheds water cleanly and looks respectable from the ground. The goal remains simple: a secure vent that keeps the roof sound and the interior free from moisture problems.
Applying roofing cement over nail heads and fastener points
Roofing cement over every nail head and fastener point closes the final entry routes for moisture. A roof vent diy job can look perfect from the outside while hidden fastener points leak for years. South African summers push roofing materials through constant expansion and contraction, so each dab of cement needs full coverage over the metal.
Work the cement with a putty knife to form a thin, even bead. Press it firmly into the counterbore or around the screw shaft. The goal is a smooth transition between the fastener and the flashing surface.
- Inspect each fastener point from multiple angles.
- Reapply cement to any thin spots before they dry.
- Allow the compound to cure fully before heavy rain.
Proper weatherproofing means every exposed metal edge receives a coat. The finished vent should shed water without relying on luck.
Installing counter-flashing where the vent meets the ridge
Counter-flashing is the last barrier between your ridge and the weather. In South Africa, summer thunderstorms arrive without warning, so the seam where the vent meets the ridge needs serious attention. Any roof vent diy project that skips this step takes an unnecessary risk with the entire roof deck. The counter-flashing slides under the ridge cap and overlaps the vent’s top edge, forcing water to run over the surface instead of sneaking underneath.
Cut the flashing from galvanised steel or aluminium. Overlap the vent by at least 75 mm and bend it to match the ridge pitch. Fix it with roofing screws, then seal each screw head with polyurethane sealant. Every gap in this layer lets moisture through directly.
If you can access the attic, look for daylight around the flashing. Light penetration means water penetration. A well-seated counter-flash turns a roof vent diy task into a finished system that sheds water predictably.
Spraying the area with a garden hose to confirm the seal
Once the counter-flashing is set and every screw is buried under sealant, the final act is proving the work. A garden hose becomes your most effective test. Run water over the finished vent for several minutes, starting at the ridge and working down each side. This simulates the summer downpour that reveals whether your roof vent diy work holds up.
Check the attic while the water runs, or have someone watch from inside. Focus on these spots:
- The seam where the counter-flashing overlaps the vent.
- Each screw head, even those sealed with polyurethane.
- The corners where the vent base meets the shingles.
A dry attic after ten minutes of steady spray is the only certificate you need.
Stepping back and inspecting the roofline for visual consistency
Stepping back after the sealant cures is a moment every roof vent diy enthusiast learns to respect. The eye travels from the ridge to the eaves, and anything out of place draws attention for years. I look for the vent’s silhouette settling into the surrounding courses, neither lost in shadow nor fighting the roof’s line.
The weatherproofing argument for visual consistency is simple. A vent with uneven margins or a tilted base creates gaps that water finds eventually. Standing at the property boundary, I study the slope as if inspecting the work from a storm’s perspective!
- The gap between vent flange and shingle edges should match on both sides.
- The cap’s highest point should run parallel to the ridge line.
- Flashing colour should settle into the roof rather than glare against it.
Each detail affects the long-term seal. A roof vent diy project that fails the visual test usually fails the water test later, because the same alignment problem leaves low spots where moisture lingers.
Common Mistakes and How to Fix Them After Installation
Identifying visible gaps or lifted shingles around the vent
After the final nail is seated, the roof should look like nothing happened. But sometimes gaps appear. Visible openings around the vent base or lifted shingle corners mean the flashing sat proud or the adhesive lost its grip.
Common culprits include:
– Nails driven at the wrong angle, leaving shingle edges raised
– Shingles trimmed too short when tracing the vent flange
– Roofing cement applied too thinly along the lower edge
Fixing these requires patience. Lift the affected shingle with a flat pry bar, scrape away old cement, and reapply a fresh layer. Press firmly and hold for thirty seconds. Verify the vent base sits level before tamping the shingle down. A roof vent diy project succeeds when water runs over every seam cleanly.
Addressing minor water drips with heavy-duty caulk or cement
Even a clean roof vent diy job can develop a minor drip after the first hard rain. A slow leak around the flashing edge does not always mean tearing everything apart. Heavy-duty caulk or roofing cement, applied with a caulk gun or putty knife, can seal a hairline gap in minutes.
Before sealing anything, dry the area completely. Trust me, water trapped under the sealant works its way through eventually. Then inspect the gap:
- Clean away loose granules and debris with a stiff brush
- Press the caulk or cement firmly into the crack
- Smooth the bead flat so water runs over it, not under it
Let the patch cure overnight, then test again with a garden hose. A quick fix extends the repair window, but keep an eye on the spot. Roof vent diy repairs hold up best when surrounding flashing stays clean and free of ponding.
Clearing leaves, dust, and bird nests from the vent screen
After the triumphant moment of a completed roof vent diy project, most homeowners forget the vent screen exists. That forgotten screen becomes a five star hotel for leaves, dust, and the occasional pigeon. A blocked screen strangles airflow and turns your vent into a decorative roof ornament.
Check the screen after every major storm. Remove the debris by hand or with a gloved finger. For stubborn buildup:
- Lift the vent cap carefully without bending the flange
- Scrape dry debris with a plastic putty knife
- Rinse the mesh with a hose, working from the inside out
Bird nests require more caution. Wear thick gloves and remove the nest before it becomes a fire hazard. Then inspect the screen for tears. A damaged screen lets critters move in and undoes the entire roof vent diy effort in one night.
Replacing worn rubber gaskets and corroded fasteners
Many roof vent diy projects fail quietly months after the last nail is driven. The rubber gasket beneath the vent base dries out and cracks under South Africa’s intense UV exposure. Coastal salt air corrodes fasteners that seemed sturdy on installation day. The result is a slow drip that stains ceiling boards long before anyone notices.
Inspect these areas when you check the screen. A gasket that has lost its flexibility needs replacement. Fasteners with white powder or rust streaks require immediate attention.
- Press the gasket with a thumb; cracking rubber means replacement
- Check screw heads for corrosion, especially on the northern side
- Look for rust-coloured water trails on shingles below the vent
Replacing these parts is straightforward. A new gasket and stainless steel fasteners cost less than a tube of roofing cement. Your roof vent diy investment deserves better than a cheap failure point.
Extending the overall lifespan of your roof with routine inspections
Common mistakes after installation usually come down to enthusiasm. You finish a roof vent diy project, admire the view, and never climb back up. That is the first error. The second is over-tightening screws until the vent base warps. A warped base leaks worse than a missing gasket.
Another mistake involves sealant. Silicone may work indoors, but South African sun turns it brittle within months. Use butyl-based roofing cement instead. And always inspect after heavy storms. Debris and wind can shift a vent cap without you noticing.
- Check the flange for warping from over-tightened fasteners
- Reapply cement at the edges before each rainy season
- Verify the screen hasn’t popped loose during gale-force gusts
Routine inspections extend your roof’s lifespan. Ten minutes on a ladder beats ten hours of ceiling repairs later. Your roof vent diy work needs regular checks, cleaning, and occasional repairs.

0 Comments