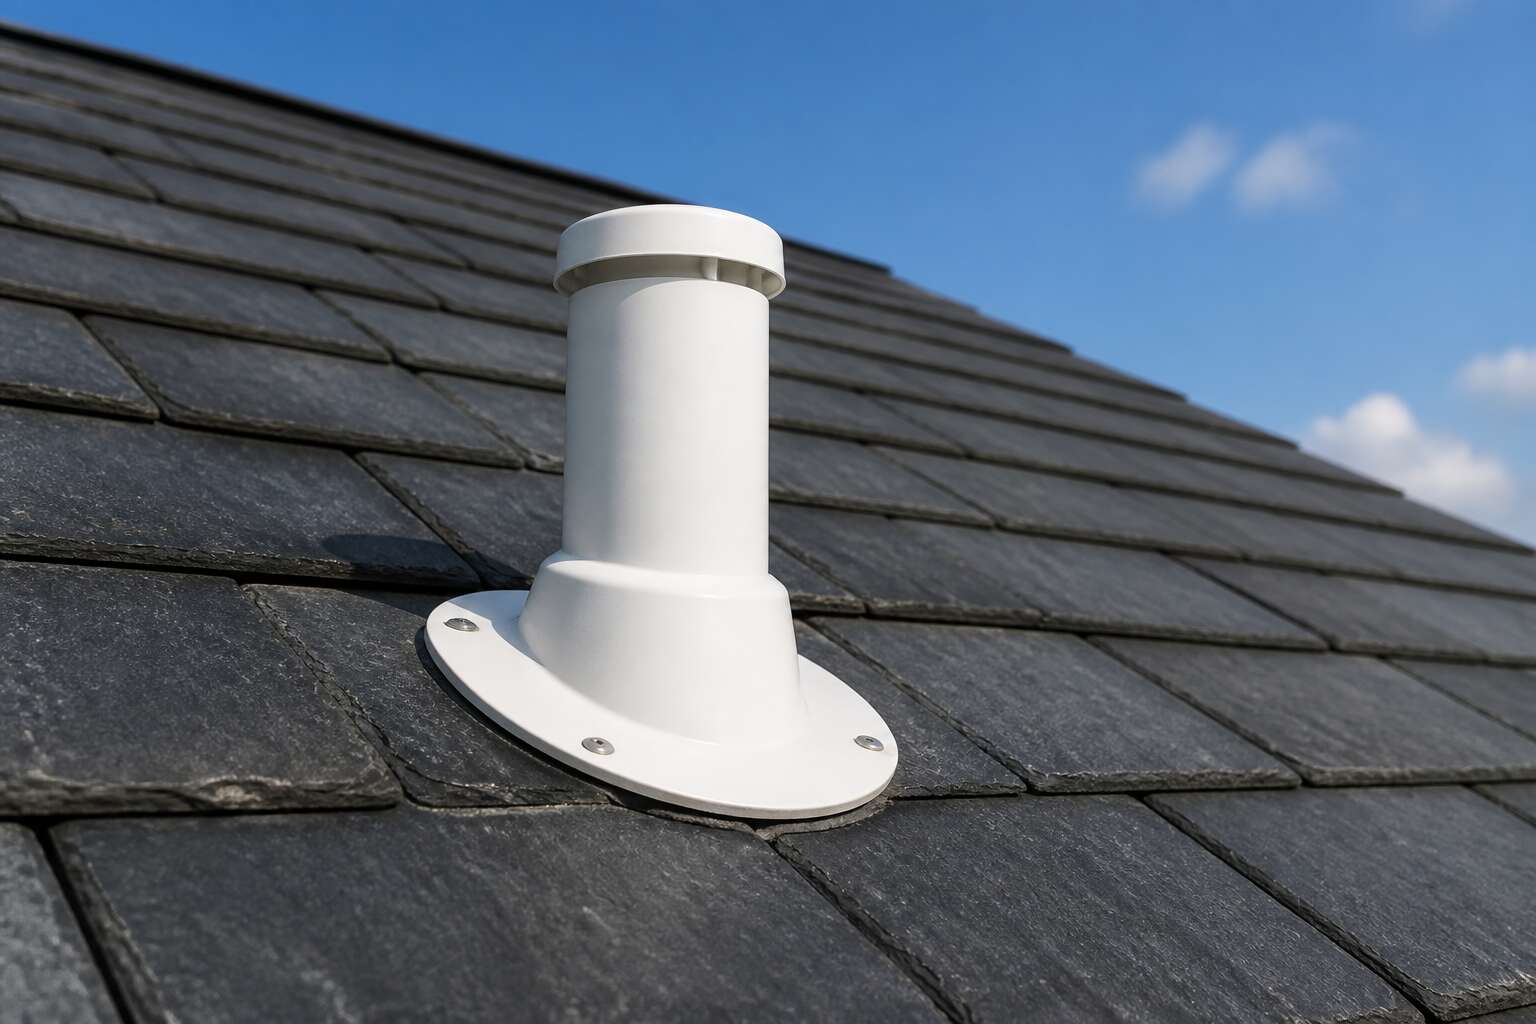
Understanding Roof Ventilation Basics
Why Ventilation Matters
Eight out of ten attic moisture problems trace back to inadequate ventilation. An 80mm roof vent may seem small, yet its role is essential. Warm air naturally rises, carrying moisture and heat into your ceiling cavity. Without a clear escape route, this trapped air can damage timber and roofing sheets.
Why does this matter? Three reasons stand out:
- It prevents condensation and rot
- It reduces indoor temperature extremes
- It extends the lifespan of your roof
That small vent allows humid air to exit while fresh air enters from eaves. This continuous exchange keeps your attic dry and balanced. For South African homes, where summer heat is intense, effective ventilation is not an afterthought. I’ve seen too many roofs fail for lack of it!
How Roof Vents Work
Most homeowners never think about their roof vent until the trusses show moisture damage. By then, the repair cost has multiplied. An 80mm roof vent exploits the law of convection: warm, humid air rises and seeks the highest escape point.
Cooler air slides in through the eave gaps, forces the humid air upward, and the vent releases it. This ongoing cycle depends entirely on the opening at the ridge.
- Outside air enters at the eaves.
- It absorbs rising heat and moisture.
- The 80mm roof vent expels it at the ridge.
In South African summers, a tin roof can trap staggering heat. A vent of this size keeps that air moving, protecting the timber underneath. Properly installed, it also reduces the strain on ceiling insulation. That is its purpose, and it is a practical one.
Types of Roof Vents
Ventilation basics boil down to one principle: let the hot air out without letting rain in. Sounds simple, but the market gives you plenty of choices. Common types include:
- Ridge vents, installed along the roof peak.
- Turbine vents, which use wind to spin air outward.
- Box vents, fixed units that rely on natural convection.
The 80mm roof vent fits into the static category. No moving parts, no maintenance, just a fixed opening sized for a standard timber roof. That simplicity matters under a South African summer sun. With a proper layout, eave intake feeds the ridge exhaust. But if you’re working with a narrow roof span or limited ridge space, this vent size works cleanly. Choose based on your roof pitch, not on fashion.
Common Vent Sizes and Applications
Vent size should match the roof cavity volume, not the builder’s whim. Most residential profiles use 60mm to 100mm openings. An 80mm roof vent sits in that range. It suits timber roofs with standard 450mm rafter spacing. The opening handles the airflow of a single ceiling void without excessive cutting.
Typical applications include:
- Underfloor spaces on elevated homes
- Bathroom and kitchen exhaust terminations
- Roof spaces on garages or outbuildings
Each application imposes its own air volume. Standard 450mm rafter spacing works with this opening; wider rafter spacing calls for a larger unit. In coastal suburbs, pair the 80mm roof vent with insect mesh. In highveld regions, wind-driven rain is the main concern. The unit’s gasket seats against the roof profile, so extra flashing is not required.
The Role of Diameter in Airflow
Choose the wrong diameter and the whole ventilating job fails. The diameter sets the limit on airflow. An 80mm roof vent clears moisture from a standard ceiling void without requiring a large cut in the sheeting.
Larger diameters shift more air, but they also create bigger openings in the roof. That raises the chance of leaks. The 80mm roof vent matches the volume of a single rafter bay in a typical South African home. It holds up on tile and IBR profiles.
A few variables decide whether this size suits your roof:
- Pitch controls how much warm air collects at the ridge
- A ceiling membrane alters the pressure balance
- Distance between vent and eaves changes the draw
In humid coastal areas, a narrower vent speeds up airflow, which wears out the mesh. This size keeps that velocity lower, so mesh and gasket last longer.
Key Considerations for Choosing the Right Vent Size
Measuring Your Roof Space
A tape measure can save you from a decade of leaks. Choosing the right vent size starts with measuring the actual space where it will live. For an 80mm roof vent, you need to know the roof sheet profile, because corrugated and trapezoidal sheets offer different seating depths. I use a tape measure to find the flat span between fasteners, then subtract insulation compression.
Here is a practical order of work:
- Determine the slope angle at the installation point using a level and protractor.
- Measure the distance from the ridge to your marked centre line.
- Check for any ceiling beams or wiring that could obstruct the duct run.
These measurements prevent the most common installation failures. Take them twice, and you will avoid surprises.
Calculating Required Ventilation Area
According to the South African National Building Regulations, roof ventilation is a structural requirement, not a decorative extra. The ventilation area you need depends on the roof footprint and the internal humidity load. For most residential extract points, an 80mm roof vent suits small bathrooms or ducted kitchens. But the correct size is determined by calculating the free area, which is the true opening after the louvres and insect mesh are counted.
The calculation starts with room volume. Divide that figure by the recommended air changes per hour for the space type, then match the result to the vent’s rated airflow. An 80mm roof vent typically provides around 3,000 square millimetres of free area, though the roof pitch and local wind exposure will alter its effective performance.
- Measure the room length, width, and height in metres.
- Multiply those figures to get the cubic volume.
- Multiply the volume by the air changes per hour required for that room.
I have watched installers oversize vents because they ignored the mesh restriction. That error hurts performance. Match the free area to the actual airflow figure, and the vent works as intended.
Matching Vent Size to Building Needs
The choice of an 80mm roof vent comes down to how honestly you assess the building’s actual behaviour. I have seen extract systems fail because the installer treated the vent as the endpoint. It is one element of a pressure loop, and a shared duct or a bend near the vent changes the effective free area.
Extract airflow degrades with every restriction before the roof vent. An 80mm roof vent performs reliably with a duct run under three metres and no more than one elbow. Longer runs call for 100mm or 125mm diameters. The 80mm unit suits a single extract point with a straight path. This configuration is common in South African townhouses but less so in cluster homes with complex ceiling layouts. The ceiling type, duct path, and roof pitch each alter the vent’s real performance. The reckoning arrives weeks after installation. The vent either handles the moisture load or it does not.
Material and Durability Factors
A roof vent that looks correct on paper can fail within a year if its material cannot endure the South African sun. The choice of an 80mm roof vent should begin with the body itself, not the price tag. Unplasticised polyvinyl chloride, or uPVC, resists warping better than standard polypropylene, and it survives the UV load common across the Highveld and coastal regions.
- Check for SABS approval on the vent body and flashing.
- Verify that the material carries UV stabilisers, especially for exposed roof positions.
- Confirm the flashing suits your specific roof pitch, whether tile or sheeting.
Size selection goes beyond diameter alone. An 80mm roof vent with a smooth internal bore moves air far better than one with a stepped or narrowed neck. That difference shows up as moisture in the duct. Look for a full bore design and a secure seal around the flange. A unit that fits poorly will rattle and leak, and no extract fan can compensate for that.
Installation Best Practices for Small-Diameter Vents
Tools and Materials Needed
A wobbly hole causes most roof leaks. For an 80mm roof vent, the installation depends on the blade you pick and the patience you keep. Start with an adjustable hole saw, a cordless drill, and a sealant that remains flexible under UV exposure.
Mark the cut point from inside the roof to avoid hidden pipes. Drill a small pilot, then enlarge it in one smooth motion. Seat the vent with a gentle twist, apply a bead of sealant around the flange, and fasten with roofing screws that have rubber gaskets. A neat fit stops water from sneaking past the edges.
- Replacement blades for your hole saw
- Butyl tape for extra weatherproofing
- A wire brush to clean the cut edge
Step-by-Step Installation Guide
For an 80mm roof vent, the installation sequence directly affects long-term weather resistance. Work through these steps without shortcuts:
- Drill a pilot hole from the interior side to verify there are no pipes or cables in the cutting zone.
- Enlarge the opening with the hole saw, keeping the drill perpendicular to the roof plane.
- Clean the freshly cut edge with a wire brush and press butyl tape around the exposed metal.
- Twist the vent into place so the flange sits flush with the roof surface.
- Run a continuous bead of flexible sealant around the flange, then fasten with gasketed roofing screws.
Tighten the screws in a crisscross pattern to seat the gasket evenly. Small-diameter vents installed this way will stay dry through highveld rainstorms.
Sealing and Weatherproofing
The true test of an 80mm roof vent arrives months after installation, when highveld heat cycles have worked the materials. A small flange offers less surface for the seal to grip, so the preparation of that surface decides everything. I clean the surrounding metal until it is bare and dry, then lay the butyl tape with intentional pressure, one continuous strip without wrinkles.
Weatherproofing relies on what the installer cannot see afterward:
- The sealant must bond to clean, dry metal, not to dust or residue.
- The gasket needs even compression across the entire circumference, which only a level flange provides.
- Water that penetrates the top layer still meets the tape barrier beneath the vent.
The screw holes remain the weakest point; each one deserves sealant run into the shank before driving.
Common Mistakes to Avoid
With an 80mm roof vent, precision matters more than force. Drill a pilot hole first, then cut with a fine-tooth hole saw. Deburr the edge; a rough rim cuts through the gasket within a season. Set the vent level on the slope, not tilted with the roof pitch. A spirit level across the flange settles this question!
Common mistakes repeat themselves in the field:
- Overtightening the screws, which warps the small flange and opens a gap under the gasket.
- Cutting the hole undersized and forcing the vent body in, cracking the collar.
- Sealing over an unprimed surface, so the adhesive never actually bonds.
Each error turns a simple component into a persistent leak. When the highveld sun bakes the roof, the 80mm roof vent either performs reliably or exposes every shortcut taken during installation.
Maintenance Tips for Longevity
An 80mm roof vent earns its place by sitting quietly through highveld storms, but that silence depends on how you bed it into the roof. On a small flange, every screw matters, so drive them in a star pattern and snug them gently. Let the sealant cure for a full day before the first rain arrives. I prefer to lay a thin ribbon of butyl tape beneath the vent, which gives the gasket a forgiving surface against the corrugations.
Maintenance becomes a twice-yearly ritual. Walk the roof after the windy season and examine the flashing for hairline cracks. Clear leaves and grit from the collar, because standing moisture finds its way into tiny gaps. A simple checklist helps:
- Inspect the gasket for brittleness
- Re-torque loose screws without overdoing it
- Clear debris from the vent opening
With that rhythm, an 80mm roof vent outlasts the rust on your fasteners!
Professional vs. DIY Installation
Installing an 80mm roof vent reveals a clear divide between professional work and DIY methods. Professionals measure the roof profile twice and cut once, while many homeowners rush the process. The compact flange leaves little room for error, so precision matters more than strength.
I have watched a professional roofer bed a vent in under ten minutes, but only because he knew exactly how the corrugations would flex. A DIYer can achieve the same result with careful preparation. The difference comes down to the sequence of steps.
- Clean the metal surface with a solvent
- Prime the area with a compatible bonding agent
- Press the vent down evenly while fastening
That final step separates a dry roof from a persistent leak. For an 80mm roof vent, the professional brings experience, while the DIYer brings attention. Both can succeed, but only one carries a warranty.
Comparing 80mm Vents with Other Diameters
Performance Differences
For serious airflow, the 80mm roof vent sits between the compact 60mm and the bulky 100mm. At a typical Cape Town wind speed, an 80mm unit delivers about 70% of the flow of a 100mm model, yet it fits into tighter roof spaces. That loss becomes critical for long extraction runs, but for a standard bathroom, it rarely matters.
I have seen installers choose larger diameters for confidence. The performance gaps show up in measurable ways:
- An 80mm vent produces less suction at extreme wind gusts.
- The 100mm version suffers more heat loss through the roof opening.
- Installation rigidity favours the smaller unit on steep metal roofs.
Comparing the numbers, the 80mm roof vent offers a practical balance. It outperforms the 60mm by a wide margin, while avoiding the structural compromises of larger cuts. That is the real tradeoff!
Cost and Availability
Price differences between diameters are less dramatic than performance gaps. A 60mm unit costs the least, yet often needs replacement when bathroom fans change. The 80mm roof vent sits in a practical middle; it costs around a third less than a 100mm model, while offering comparable availability across South African hardware stores.
I have watched contractors order 100mm vents from suppliers, only to wait weeks for stock. The 80mm roof vent, by contrast, moves quickly off shelves. Consider the typical price spread:
- 60mm: roughly 20 percent cheaper than 80mm
- 100mm: roughly 15 to 30 percent more expensive
Installation accessories also affect the final bill. Smaller flashings cost less, but the 80mm roof vent has more compatible pipe options than the 60mm. For most homeowners, the balance of cost and availability makes 80mm the easier choice.
Suitability for Different Roof Types
While a 60mm vent suits small bathrooms, it struggles to clear moisture from larger rooms. The 80mm roof vent moves air at a rate suited to most residential roofs without the bulk of a 100mm unit. It delivers roughly 70 percent of the airflow of a 100mm model, yet fits into tighter roof spaces with less structural adjustment.
Roof type matters. For concrete tile roofs, the 80mm flashing seals cleanly against the tile profile. Corrugated iron and IBR sheeting accept the 80mm roof vent with a simple hole saw cut. In my experience, thatch roofs require longer flues and often push installers toward the 100mm size.
The 80mm works best on:
- Concrete or clay tile roofs with standard spacing
- IBR and corrugated steel sheeting
- Roofs with rafter spacing under 600mm
On these surfaces, it installs quickly and needs fewer adapters than the 60mm.
Frequently Asked Questions and Troubleshooting
How Much Ventilation Do I Need?
Under-ventilated roof cavities account for a large share of structural rot in South African homes. A single 80mm roof vent moves only about 30 cubic metres of air per hour, which is rarely enough for an entire roof. The most frequent question we get is whether one vent is sufficient.
The honest answer is almost never. Roof pitch, insulation thickness, and the local climate all play a role. If you see condensation on the underside of the roof sheeting, that is the first sign your ventilation is inadequate. Proper placement means the vent sits at the highest point, where heat and moisture collect, but a single vent will not solve a poorly designed system.
Look for these indicators during your next roof inspection:
- Persistent dampness on insulation
- Musty odours coming from the ceiling cavity
- Warped timber purlins after a dry season
The standard calculation, covered earlier, provides a baseline. The true test is performance. If your roof cavity feels stuffy or shows any warning sign, that baseline is not enough. Adding another 80mm roof vent is the most direct correction.
Can I Install a Vent Myself?
Many homeowners assume that fitting an 80mm roof vent is a simple afternoon task, and in truth, the physical drilling is straightforward. The deeper challenge lies in placement. A vent installed in the wrong spot can pull moist air from a bathroom or kitchen directly into the roof cavity, creating a problem worse than the one you fixed.
The critical work happens before you touch a drill. You must confirm there is no existing insulation blocking the airflow path from the eaves to the ridge. If your ceiling has a thick vapour barrier or recent spray foam, the vent will only service a small pocket of stagnant air.
For a standard corrugated iron roof, the steps are manageable:
1. Mark the highest practical point, away from roof trusses.
2. Cut a pilot hole and enlarge it carefully with a hole saw.
3. Apply a generous bead of butyl sealant around the flange.
4. Screw the vent down without over-torquing the fasteners.
The real test happens during the first heavy rain. Wind-driven water can find its way past a poorly seated gasket, so check the surrounding sheeting for gaps before you declare victory. If your roof pitch is steeper than 30 degrees, consider asking a professional to handle the flashing, as a misaligned cut here can compromise the entire waterproofing system. The 80mm roof vent is forgiving, but only to a point.
How to Fix Vent Leaks
How does a leaking 80mm roof vent reveal itself? Usually as a dark stain on the ceiling or a drip that traces back to the flange during a storm. Before you blame the vent itself, inspect the gasket! A compressed or unevenly seated neoprene seal is the usual culprit.
- A cracked or worn gasket that needs replacement
- Fasteners loosened by thermal expansion
- Aged butyl sealant lifting away from the sheeting
Once you have found the breach, scrape away the old sealant and apply a fresh bead before re-seating the vent. Tighten screws in a star pattern to keep the flange flat. If water still appears, the sheeting beneath may be corroded. Install a new 80mm roof vent on sound roofing rather than patching a compromised area.
Improving Airflow in Existing Vents
Airflow through an 80mm roof vent can be generous, but only when the system is balanced. Homeowners often mistake a weak draft for a faulty unit. The real culprits are usually positioning and pressure. Is the vent shaded by a gable wall? Does the roof pitch create a high pressure zone? Hold a smoke source near the vent. If smoke lingers, you have a blockage or a dead air pocket.
For common airflow faults, run through this checklist:
- Inspect the vent for internal corrosion or a dislodged baffle.
- Verify the flashing hasn’t created a recess that collects water and weakens movement.
- Measure the clearance around the base to ensure nothing obstructs the draw.
An 80mm roof vent works best with a clear path from eave to ridge. If blockages are ruled out and performance remains poor, check whether the vent’s diameter actually matches your roof space. A larger vent might be needed, but a clean and properly seated unit often resolves the issue on its own.



0 Comments