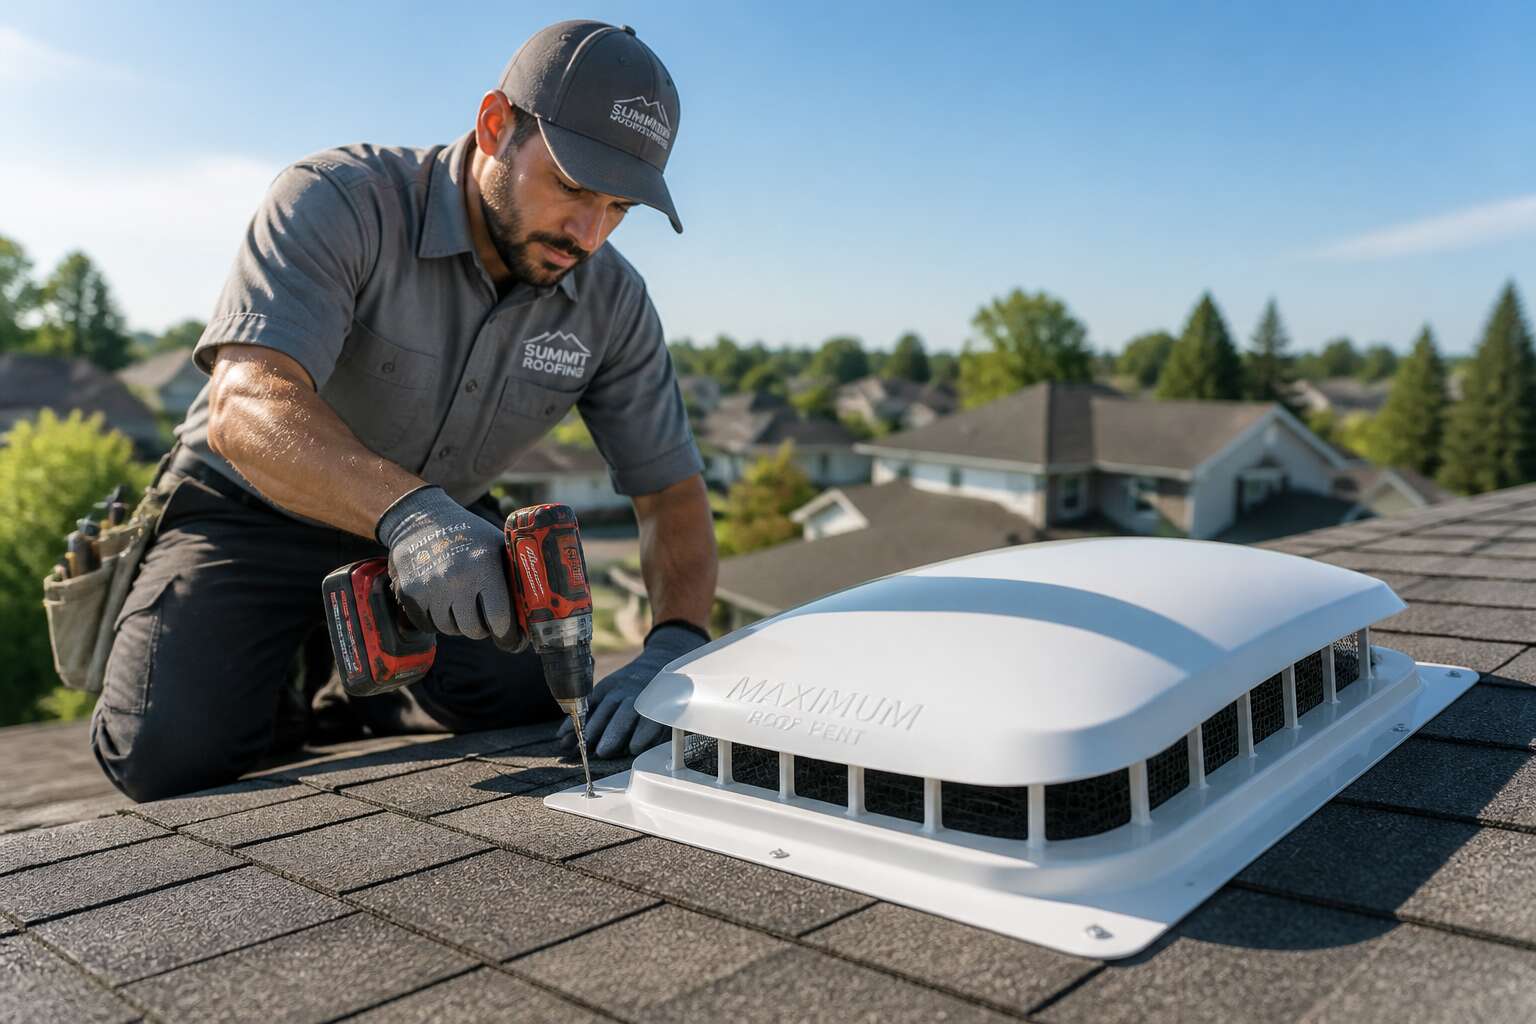
Understanding the Fundamentals of Balanced Attic Ventilation
Why Proper Attic Airflow Extends Roof Lifespan
A pressure imbalance in the attic is the quiet adversary of every South African roof. When heat accumulates beneath the tiles, it does not merely make the living space uncomfortable. It slowly cooks the roofing materials from the inside out. This thermal buildup accelerates the degradation of the underlayment, causing it to become brittle and lose its waterproofing qualities. The rafters themselves suffer, warping under the stress of uneven temperatures and moisture.
Proper airflow performs two essential functions. It expels superheated air during our sweltering summers, and it removes the condensation that forms during the colder Highveld winters. This moisture is the primary catalyst for rot and fungal growth. When you consider that humidity can linger for hours after a storm, the need for effective extraction becomes critical. A balanced system ensures that air enters at the eaves and exits near the ridge, creating a continuous, unbroken stream.
The mechanisms by which airflow extends the life of your roof are straightforward:
– It prevents the timber frame from absorbing excess moisture, which compromises structural integrity.
– It maintains a consistent temperature across the entire deck, preventing the warping and splitting caused by uneven thermal expansion.
– It stops the corrosion of metal fixings and flashing, which is often induced by trapped humidity.
Every degree of excessive heat and every droplet of trapped condensation contributes to a shorter service life. An unventilated attic can reduce the lifespan of your roofing materials significantly. The cost of replacing these elements far exceeds the investment required to balance the system. This is why achieving a maximum roof vent installation is not about adding more components, but about positioning them with precision to harness the natural rising of warm air. Without this dynamic flow, the structure ages prematurely, decade after decade.
Key Components of a Complete Ventilation System
Balanced attic ventilation is a simple equation. Air enters at the eaves, warms up, rises, and exits near the ridge. The key components of a complete ventilation system are fewer than you think. Soffit vents, ridge vents, and baffles. That is the entire kit.
Here is what each component does:
– Soffit vents pull in outside air
– Ridge vents release the superheated air
– Baffles stop insulation from blocking the path
A maximum roof vent installation demands correct sizing. The accepted ratio is one square foot of vent area per 300 square feet of attic floor. In South Africa, where roofs face brutal summer sun and Highveld frost, precision matters. A system that ignores the balance between intake and exhaust will underperform, no matter how many vents you add.
Common Ventilation Mistakes That Undermine Performance
A roof vent that exhausts more than it pulls in creates a vacuum that siphons air from your living area. Most maximum roof vent installation failures trace back to this fundamental error. Balanced attic ventilation is a parity between intake and exhaust, not a competition. The common mistakes that undermine performance are predictable:
- Blocked or missing baffles
- Insufficient net free area at the eaves
- Mixing incompatible vent styles
Each mistake breaks the pressure dynamic. In Highveld summers, I have seen systems with too much exhaust and too little intake force the ridge vent to act like a chimney, pulling dust and humidity through the home. Balance is the only thing that keeps the trusses dry and the tiles intact.
How Moisture and Heat Buildup Impact Shingle Integrity
In Highveld attics, summer temperatures can push past 60 degrees Celsius. That heat has nowhere to go when intake and exhaust are mismatched. The fundamentals of balanced attic ventilation rest on a simple equation: every square centimetre of exhaust needs corresponding intake at the eaves. My inspections repeatedly show that maximum roof vent installation fails when this ratio is ignored!
Heat buildup accelerates shingle deterioration. The asphalt softens, granules loosen, and the protective layer erodes years before its expected lifespan. Moisture operates differently but with equal damage. Warm, humid air condenses on the underside of the decking, leading to rot and fastener corrosion.
- Solar radiation drives thermal cycling
- Condensation creates persistent dampness
- Both conditions compound without balanced airflow
The pressure dynamic matters more than total vent count. Maximum roof vent installation prioritises equilibrium, not volume.
Calculating Ventilation Requirements for Your Roof Dimensions
Measuring Attic Square Footage and Net Free Area
One square foot of Net Free Area for every 300 square feet of attic floor is the accepted benchmark. Attic square footage comes from the building footprint, not the sloped roof area. Walk the exterior, multiply length by width, and ignore spaces below soffits!
- Measure the longest exterior walls
- Multiply length by width
- Divide the result by 300
Net Free Area defines the open space in a vent through which air actually moves, not the full louvre width. A ventilator rated at 144 square inches NFA delivers exactly that. Achieving maximum roof vent installation means balancing NFA between intake and exhaust, with 50 percent at the eaves and the remainder near the ridge. South African summers punish under-ventilated roofs, so the 1:300 ratio is the baseline for maximum roof vent installation.
Calculating Intake-to-Exhaust Ratio for Optimal Airflow
A static calculation rarely survives contact with a working roof. The 1:300 ratio gives you the total Net Free Area, but that number only matters if you divide it correctly. The intake side at the eaves must carry its half of the load before you ever think about ridge vents. A roof with 10 square feet of required NFA needs 5 square feet pulling air in at the soffits and 5 square feet exhausting at the peak. Skimp on the intake and your exhaust becomes a decorative feature rather than a functional one.
Working through the numbers for a specific home keeps things honest. Consider a 25 by 40 foot footprint, which gives you 1,000 square feet of attic floor. Dividing by 300 leaves you with 3.33 square feet of total NFA, or roughly 480 square inches. Assign 240 square inches to the soffit vents and the same amount to the ridge. The placement along the roofline matters more than the total, because air takes the path of least resistance and will short circuit through the closest vent openings if you let it.
– Measure the exact dimensions of your soffit vents.
– Count the linear feet of ridge vent you plan to install.
– Divide the NFA rating of each component by its length or area.
– Adjust the layout until the intake square footage matches the exhaust within 10 percent.
The physical reality of hot air rising means your ridge vent does the heavy lifting on the exhaust side, but it only performs when the intake pressure equalizes at the eaves. A maximum roof vent installation depends on this equilibrium holding steady through the heat of a Highveld afternoon. Get the ratio wrong by a third and you might as well have installed nothing at all.
How Roof Pitch and Climate Zone Influence Requirements
Roof dimensions only tell half the story. A 1,000 square foot attic in Durban’s humid subtropics demands a different ventilation strategy than the same footprint in the dry Karoo. Your maximum roof vent installation must account for both the physical geometry and the local climate, because both affect how air moves through the space.
Pitch changes the effective stack height. A steeper roof creates a stronger thermal draw, which means you can often balance the system with slightly less exhaust area. Lower pitches rely more on wind and require precise intake placement.
- Map the roof’s slope angle before selecting vent types.
- Check your region’s average summer temperatures and humidity.
- Adjust NFA calculations upward for coastal or high rainfall zones.
Climate zones in South Africa range from Mediterranean to subtropical, so a one size fits all calculation fails. Work through the numbers for your specific roof, then adjust for local conditions. The maximum roof vent installation matches the roof’s geometry to the air movement your climate demands.
Tools and Online Calculators for Accurate Estimates
One inaccurate estimate can leave a 500 square metre roof with 20 percent less airflow than it needs. That shortfall shows up as trapped heat and moisture. Tools exist to prevent this.
- Digital roof measurement calculators
- NFA conversion tables
- Climate adjustment multipliers
Input the true deck dimensions, not rounded figures. The maximum roof vent installation starts with net free area, and calculators refine that number to your specific roof. Use a tool that accepts pitch as a slope ratio. That changes the effective stack height. South African online calculators often include regional climate modifiers. Enter your postcode to apply them. The output is only as reliable as the measurements you feed it. Measure twice, calculate once.
Selecting the Best Vent Types to Maximize Air Volume
Continuous Ridge Vents vs. Stationary Vents: A Comparative Look
A continuous ridge vent along a 10 meter roof peak moves roughly 30 percent more air than a row of stationary vents covering the same span. That volume determines whether your attic vents effectively or traps heat under the African sun. This is the core choice in maximum roof vent installation.
- Ridge vents sit at the roof’s highest point, where heat collects.
- Stationary vents sit lower and depend on wind direction.
Cape winters bring humidity. Highveld summers bring heat. Both punish weak exhaust. For maximum roof vent installation, the ridge vent wins on air volume, provided the opening matches the manufacturer’s spec. Stationary vents remain useful for complex roof angles, but they cannot match the continuous draw of a ridge vent.
Soffit Vents: The Foundation of Effective Intake
Imagine a sweltering afternoon in Johannesburg, the sun hammering down on a tiled roof. The heat radiates inward, and the air inside the attic becomes a thick, stagnant blanket. For any maximum roof vent installation to succeed, the focus often falls on the exhaust at the peak. Yet, without a steady supply of fresh air entering the system, that powerful ridge vent is merely a fan blowing into a sealed room.
Soffit vents are the quiet, unglamorous foundation of the entire airflow equation. They sit under the eaves, hidden from street view, pulling cool air into the lowest point of the roof cavity. This incoming air is the pressure that forces the hot, humid air out through the ridge. The relationship is simple; if the intake is choked, the exhaust is useless.
We often see homeowners who have installed a beautiful, continuous ridge vent but have ignored the soffits entirely. The result is a negative pressure situation that can actually draw air from inside the living space into the attic, dragging moisture with it. During a Cape winter, that moisture condenses on the cold nails and timber, leading to rot that silently compromises the structure. The intake is not a compliment to the system; it is the primary engine.
To ensure you have enough draw, consider the specific installation requirements that affect air volume:
– Open area: The soffit material must have a high percentage of open space, not just a few small punched holes.
– Cladding: Solid aluminium or wood soffits require vent strips to be fitted, which reduces the visual impact but is necessary.
– Baffles: Ensure insulation does not block the airflow path from the soffit into the attic cavity.
Calculating the intake area is straightforward, but it demands precision. For maximum roof vent installation, you need roughly the same net free area at the soffits as you have at the ridge. More is often better, as it reduces the resistance to the airflow. The goal is to create a continuous, gentle wash of air that moves across the entire underside of the roof deck, keeping the timber dry and the shingles cool. Ignore this step, and you are paying for the exhaust while never receiving the benefit.
Power Vents and Solar Attic Fans: Boosters or Budget Busters
Power vents and solar attic fans promise to supercharge airflow, yet they can derail a maximum roof vent installation when chosen for the wrong reasons. Mechanical exhaust adds noise, maintenance, and running costs. In many South African homes, a well designed passive system does the job quietly. Still, there are situations where a booster makes sense.
Consider these three factors:
- Low pitch roofs with limited ridge length
- Complex hip geometries that interrupt natural flow
- Attics with heavy ductwork that blocks air movement
A powered fan must work with your intake, never against it. The most effective maximum roof vent installation uses passive and mechanical elements in careful proportion.
Turbine Vents and When They Create More Harm Than Good
Turbine vents are a familiar sight on South African rooflines, spinning away in the afternoon breeze. They move air with no running costs. For a maximum roof vent installation they appear perfect. But a turbine only performs when the wind matches its design. It also needs a straight, short duct to the attic. Long bends ruin the draw.
We often ignore these conditions. I have seen turbines mounted in wind shadows that barely rotate. Consider when turbines cause trouble:
- Long runs of flexible duct create friction and reduce flow.
- Nearby buildings or trees block the prevailing wind.
- Shallow roof slopes leave the turbine below the ridge line.
A static turbine is worse than no vent. It denies the attic any exhaust path at all.
Choosing Vents Compatible With Your Roofing Material
The best vent on the shelf still fails when paired with the wrong roofing profile. I have inspected homes where expensive equipment sat useless because the mounting base clashed with the material beneath it. A maximum roof vent installation only reaches peak air volume when every component matches the roof’s structure. Metal roofs demand low profile vents with corrosion resistant fasteners. Clay tiles require raised bases that clear the curve and shed water without pooling.
Airflow stalls at the first incompatible joint. The vent’s footprint must align with the roof pitch and the manufacturer’s fastening pattern. Ignore this and you create a leak path that chokes performance. Choose vent types that fit your exact covering, not the cheapest universal option. That decision defines the entire system’s output.
Low-Profile vs. High-Profile Vent Designs for Aesthetics and Flow
Low profile vents sit close to the roofline, which makes them nearly invisible from the street. That aesthetic appeal costs airflow. The internal chamber is shallow, so the net free area shrinks. High profile vents rise above the deck, catching more wind and creating a stronger draw. They look utilitarian, but they move real volume. For a maximum roof vent installation, the choice depends on whether you prioritise sightlines or cubic metres of air per hour.
In Cape Town’s southeaster, a high profile vent will outperform a low profile unit on the same pitch. The exposed baffle accelerates air movement. Low profile vents work best on flat or low slope roofs where wind rarely reaches the surface.
- Low profile: sleek, minimal, reduced capacity
- High profile: bulky, visible, superior exhaust
That distinction decides how much stale attic air actually leaves the building.
Strategic Placement for Enhanced Airflow Across the Attic
Mapping Out High-Pressure and Low-Pressure Zones
Air does not flow through a static attic. Pressure differences drive every cubic meter, and for maximum roof vent installation, placement means everything. High-pressure zones build where wind strikes the lower slope. Low-pressure zones sit along the ridge and the leeward plane. Soffit vents need to align with the high-pressure area; ridge vents must face the low-pressure side.
A simple rooftop survey helps you map these zones. Windward soffits get positive pressure. The ridge and upper roof draw negative pressure. Intersections like dormers and valleys disturb the flow. Matching your intake and exhaust to those mapped zones delivers consistent extraction. It saves you from buying powered fans that mask a poor layout.
Positioning Exhaust Vents at the Peak: Techniques and Pitfalls
A ridge vent misaligned with the actual pressure peak can reduce extraction by nearly half. The highest point of the roof generates the strongest negative pressure, but only when the vent channel runs uninterrupted. Every gap in the sheathing breaks the suction line, creating isolated pockets where warm air lingers.
I have seen homeowners seal off the vent with insulation, thinking they were stopping heat loss. That mistake nullifies the entire maximum roof vent installation. Three techniques preserve the pressure differential:
- Cut the sheathing back 5 to 8 centimetres from the ridge.
- Install a wind baffle to keep insulation out of the channel.
- Fasten the vent low enough so rising air reaches it without turbulence.
The pitfall is assuming a flat roofline means a uniform peak. Valleys and hips redirect pressure! A maximum roof vent installation demands checking each ridge segment independently, because what works on the main slope fails at a break.
Ensuring Adequate Intake Along the Eaves and Soffit Channels
Attic airflow depends on a continuous pressure path from the eaves to the ridge. If the intake paths are restricted, the entire maximum roof vent installation underperforms. Soffit channels must remain open and unobstructed, allowing fresh air to replace the warm air escaping at the peak.
I have walked through attics in Johannesburg and Durban where insulation blocked the soffit gaps entirely. The pressure differential collapses, and the exhaust vents pull air from ceiling gaps instead of the outside. Careful attention to intake placement matters as much as the vent itself.
Common culprits are loose fibreglass batts, debris from roof work, and perforated panels painted over during maintenance. Each one narrows the channel until the system draws air through a crack. Without balanced intake along the eaves, even the best maximum roof vent installation cannot establish the airflow needed to regulate temperature and moisture.
Avoiding Short-Cycling in Chases, Vaults, and Dead-Air Spaces
Attic airflow is a game of inches. A maximum roof vent installation can exhaust air perfectly at the ridge, yet fail to condition the space below. The culprit is short-cycling, where fresh air enters, takes the path of least resistance, and exits immediately. It never sweeps across the insulation or purges the hot air trapped in structural pockets.
This is a common issue in Cape Town homes with complex rooflines. Chases for plumbing or ductwork create vertical channels that act like chimneys. Air rushes up these shafts and out the vent, bypassing the main attic floor. Vaulted ceilings present another challenge, as the steep angle can trap heat in the apex above the insulation.
Dead-air spaces form in areas where the roof geometry changes, such as valleys or dormer transitions. Without strategic placement, these zones remain stagnant.
– Block the base of chases with rigid foam to force air into the main attic.
– Install baffles at the transition points to direct air over the insulation.
– Position additional intake near vaulted sections to create a local pressure drop.
The goal is to manage the pressure gradient. You want the air to travel a deliberate path, from the soffit, across the floor, and then up to the exhaust. This ensures the entire attic volume is flushed. When you control the route, the maximum roof vent installation does more than just move air, it regulates the entire envelope.
How Baffles and Baffle Installation Improve Channel Performance
Baffles direct airflow with mechanical precision. Without them, air enters the soffit, shrugs, and wanders into a structural void. That is a wasted opportunity, especially when you have invested in a maximum roof vent installation.
Strategic placement matters more than raw volume. A baffle installed at the wrong angle can pinch the airflow and create a bottleneck. One installed correctly turns a cramped channel into a smooth passage.
Consider these placement checkpoints:
- Staple baffles securely to the roof deck so they do not sag mid-span.
- Leave a clear path for insulation to tuck behind the baffle without blocking the airway.
- Match the baffle depth to your rafter depth for a snug fit.
The channel is only as good as its straightest line. Baffles that bow or gap allow air to escape laterally, which defeats the entire exercise. A maximum roof vent installation depends on every inch of that channel functioning as intended, from the eaves to the ridge.
Step-by-Step Installation Process for Expanding Vent Capacity
Pre-Installation Inspection: Checking for Blockages and Insulation
Maximum roof vent installation starts with a clear path, not with a saw. Before expanding anything, I crawl into the attic and inspect each intake channel. Insulation often creeps over the soffit vents, suffocating the airflow before it ever rises.
- Check every soffit intake for loose fibreglass or cellulose buildup.
- Peel back insulation near the eaves to expose the baffle edge.
- Remove nests, dust clumps, or fallen debris that block the opening.
Blockages can hide beneath thermal layers, so run your hand along the underside of the roof deck. If the gap feels tight, the insulation is too deep. Clear it completely, then measure the unobstructed area. That number tells you whether the added capacity will actually function.
Cutting Penetrations Safely: Tools and Fastening Techniques
One misplaced nail can compromise a penetration within ten rainy seasons. I treat maximum roof vent installation as a cutting exercise first, then a fastening exercise. Mark every vent location from the attic, drill pilot holes up through the deck, follow those holes with the saw.
The tools matter less than the sequence. For tile roofs, use a diamond disc; for metal sheeting, use aircraft shears. Cut from the top edge downward so the saw’s weight carries through the material. Keep the attic below clear! The blade kicks screws and grit into the insulation.
- Nails go into a bed of roof sealant, never dry.
- Torque fasteners before the sealant sets.
South African coastal wind loads call for doubled rafters at cut-outs, especially when maximum roof vent installation spans several trusses. Skip this and the opening flexes, cracking the seal. Fastening technique becomes the whole job once the saw stops.
Flashing and Sealing Around Vents to Prevent Leaks
Expanding vent capacity means more than cutting another hole in the deck. Each new opening increases the risk of water ingress, so sequence matters. After marking and cutting, verify the surrounding structure can bear the load. South African coastal winds demand extra fastening points.
Flashing comes next. Slide the vent’s base flange under the roofing material above it, then fasten the lower edge on top of the material below. This shingling effect directs water away from the seam. Use a continuous bead of butyl sealant under the flange, not just at the screw holes.
- Set the vent in place and check for level.
- Drive screws into the pre-marked pilot holes.
- Torque each fastener before the sealant cures.
- Apply a second sealant bead over the screw heads.
For maximum roof vent installation, the final seal matters as much as the cut. Inspect the gap between vent and roof deck. A tight fit prevents leaking. Ensure the flashing overlaps by at least 50 millimetres.
Adding Ventilation Without Compromising Structural Integrity
Expanding vent capacity starts with a plan, not a saw. Before you widen any opening, confirm the rafters and trusses can handle the change. A roofer in Cape Town once told me that the fastest way to ruin a good roof is to assume the framing will forgive you.
- Mark the new vent location between structural members.
- Cut with a circular saw set to deck thickness.
- Support the cut edges with additional blocking.
- Fasten blocking before placing the vent.
This sequence keeps the roof deck sound while you increase airflow. For maximum roof vent installation, the blocking step is non-negotiable. Skip it and the structural integrity of the roof declines quickly. Each fastener should bite into solid wood, not the edge of a cut that leaves splinters behind.
Code Compliance and Permit Requirements for Roof Vent Work
Expanding vent capacity follows a sequence that rewards patience. I tell clients a maximum roof vent installation starts by measuring the opening and confirming the new vent fits between rafters. The work moves through these steps:
- Remove only the shingles and decking needed for the penetration.
- Set the vent base in sealant and fasten it through the deck into the framing.
- Install flashing over the top edge and side flanges before replacing the shingles.
Each step keeps the deck watertight and the vent secure.
Code compliance matters as much as technique. South African municipalities require plan approval for roof alterations, and vents are no exception. A permit ensures the work meets the National Building Regulations, covering fire safety and weatherproofing. Without approval, expect fines and selling complications. Local rules vary by municipality. For maximum roof vent installation, the paperwork is part of the process.
Working With a Professional vs. DIY Installation Considerations
Expanding vent capacity requires a methodical approach. A maximum roof vent installation starts with confirming the framing layout, then cutting only what the new base requires. You must fasten the vent through the deck into rafters, and finish with flashing that locks under surrounding shingles. Small errors here cause leaks that mock your effort. Patience at each stage keeps the roof watertight.
Working with a professional versus attempting DIY comes down to three realities:
- Access to the roof slope safely
- Ability to match existing shingle patterns
- Confidence resealing all edges
On a complex roof, a contractor’s price beats a weekend of regret. The tools alone, from pry bars to roofing nailers, add up. A professional also handles unexpected rafter locations without hesitation.
Verifying Performance and Fine-Tuning Your Ventilation System
Simple Tests to Confirm Air Is Flowing in the Right Direction
Smoke gives honest feedback about airflow. A maximum roof vent installation needs a field test, not paper calculations. I keep a cheap incense stick in my toolbox for this exact purpose. The procedure is straightforward.
- The smoke near the intake vent gets pulled inward.
- The smoke at the ridge vent gets pushed outward.
- Three test points across the roof line expose dead-air spots.
In the Highveld, solar gain is intense. If the smoke reverses direction, a short-cycle exists. The system pulls air from the ridge instead of the eaves. That is a direct path to moisture trapping. The usual culprit is blocked baffles, which undermines the entire maximum roof vent installation if left unchecked.
Signs of Over-Ventilation: Drafts, Odors, and Air Infiltration
Verifying performance after a maximum roof vent installation means paying attention to the house, not only the roof. In the Highveld, a balanced system is quiet. You should not feel a persistent draft near a closed window on a windy day. That sensation often means the attic is pulling conditioned air from the living space, a sign of negative pressure from too much exhaust and too little intake.
Odours are another clue. If bathroom or cooking smells linger, the ventilation stack may be competing with the attic fan. Air infiltration shows up as dust streaks around door frames or a whistling sound near light fittings. These symptoms mean the system needs fine-tuning.
- Drafts near interior doors on calm days
- Recirculating smells from the kitchen or bathroom
- Dust accumulating on top floor surfaces
Each signal indicates an imbalance. The fix is rarely a larger fan. It is usually a matter of sealing bypasses and confirming the intake path, the true measure of maximum roof vent installation.
Seasonal Adjustments to Maximize Efficiency in Hot vs. Cold Climates
Verifying performance after maximum roof vent installation is a seasonal affair. In Highveld summers, your attic should feel like a well-behaved oven, not a blast furnace. If the fan runs harder on a mild day, check the intake. In winter, the opposite holds. Cold climates demand less exhaust, more sealing. Balance shifts with the sun.
Seasonal adjustments matter more than brute force. In hot months, increase intake to push heat out. In cold months, reduce power vent usage to avoid drawing warm air from living spaces. A system that works in January may misbehave in July. So test both extremes.
- Confirm airflow direction at soffit and ridge.
- Listen for whistling near windows.
- Note attic temperature at noon and midnight.
These steps keep your maximum roof vent installation honest without overcomplicating life.
The Role of Smart Vents and Humidistats in Dynamic Control
A roof vent that runs on a fixed schedule is guessing. Smart vents and humidistats replace guesswork with measurement. A humidistat reads the moisture load in the attic and adjusts exhaust accordingly. A smart vent responds to temperature differentials, humidity, and wind pressure. This dynamic control transforms maximum roof vent installation into a responsive system.
Consider what to verify after a maximum roof vent installation that includes these components.
- Confirm the humidistat threshold matches your climate zone.
- Place sensors away from direct sunlight.
- Test the smart vent during a sharp temperature swing.
South African summers bring afternoon thunderstorms and sudden humidity spikes. A humidistat set to 50 percent relative humidity in Gauteng behaves differently at the coast. Smart controls let you adjust settings without climbing onto the roof. I have yet to see an attic where these adjustments made things worse. Fine-tuning becomes a matter of reading data, not guessing.
Periodic Maintenance: Clearing Debris and Inspecting Sealants
Verifying performance after a maximum roof vent installation comes down to measurement, not guesswork. A humidistat set at 50 percent relative humidity in Gauteng behaves differently at the coast, so confirm the threshold matches your climate zone. Place sensors away from direct sunlight, otherwise the readings shift with every passing cloud.
Test smart vents during a sharp temperature swing. A sudden afternoon thunderstorm in Johannesburg creates a pressure change you can feel, and the vent should respond within minutes. Fine-tuning becomes a matter of reading data rather than climbing onto the roof for another adjustment. Periodic maintenance follows the same principle. Clear debris from intake channels and inspect sealants for cracking after a heavy storm season. Water finds any gap.


0 Comments