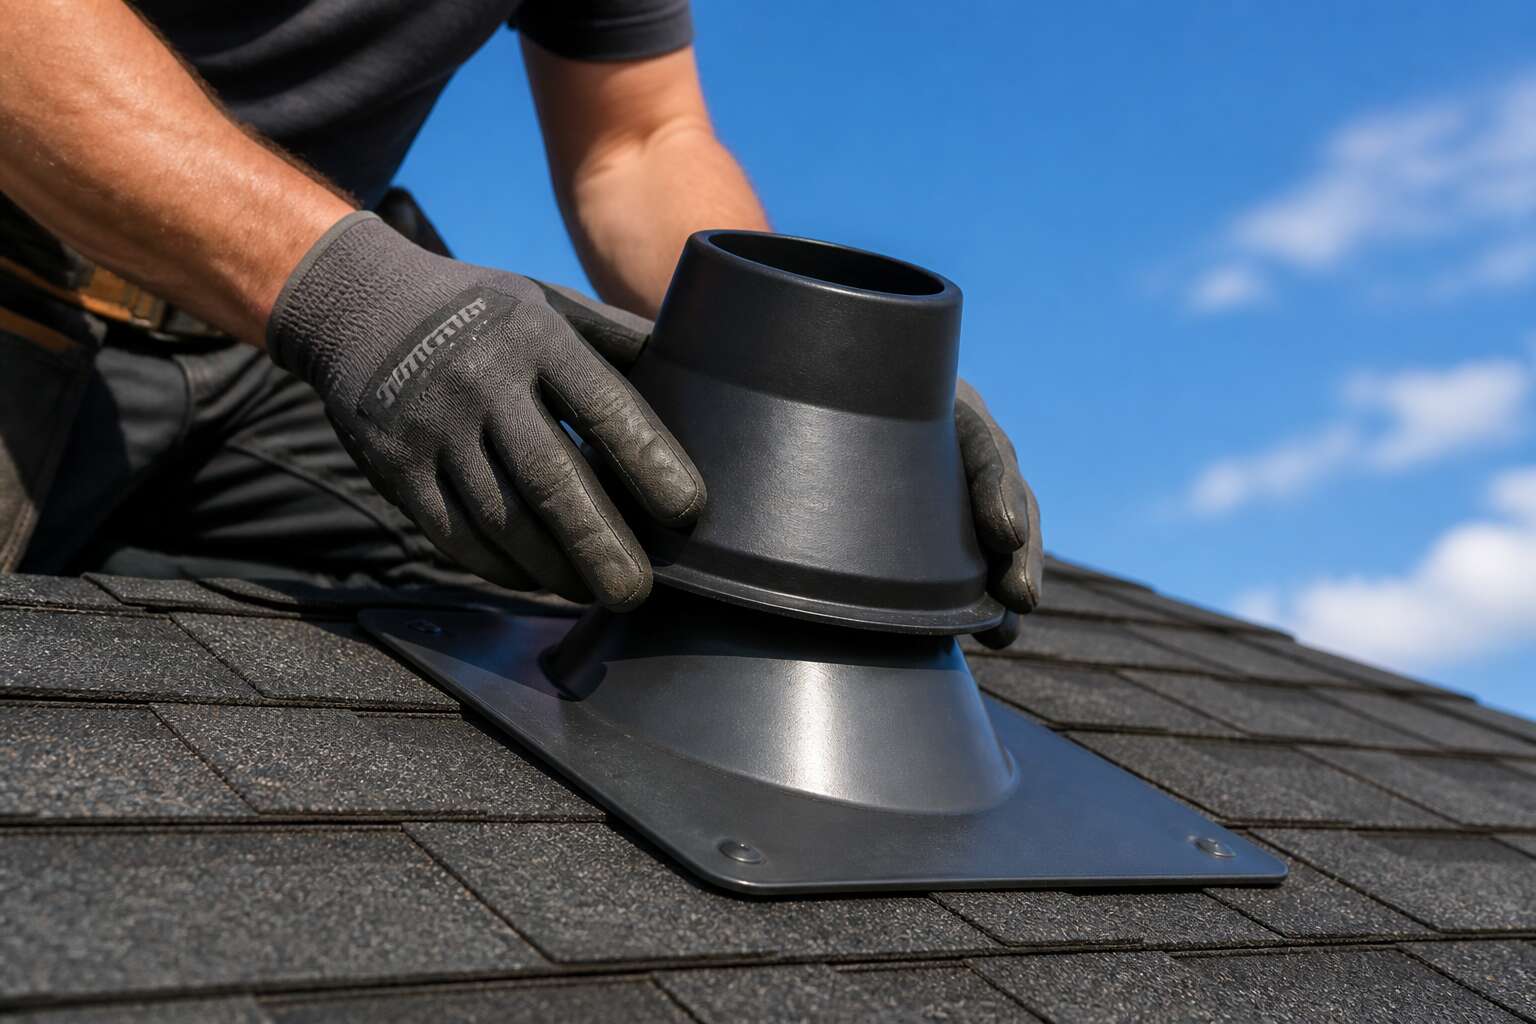
Understanding Roof Vent Adapters
Definition and Primary Purpose
Every South African roof has a pipe poking through it. The roof vent adapter is the fitting that keeps rain, dust, and the occasional hadeda from turning your ceiling into a swamp. Defined simply, it is the transitional connector between your plumbing vent pipe and the roof penetration.
Its primary purpose is to bridge that gap while maintaining a waterproof seal. From my experience, without it, moisture sneaks into your insulation, timber rots, and your attic grows mushrooms. The adapter handles several jobs at once:
- Seals the joint against water ingress
- Accommodates different pipe diameters
- Flexes with roof pitch variations
- Blocks debris and animal intrusion
A durable roof vent adapter must withstand UV exposure, temperature swings, and violent summer thunderstorms. Cheap alternatives crack within two seasons, leaving you with a persistent leak and a plumber who charges by the sigh.
How Roof Vent Adapters Work
A summer storm hits a Gauteng roof at 100 kilometres per hour, yet the ceiling stays dry. That is the roof vent adapter working as intended.
The adapter functions through compression. A flexible rubber boot grips the pipe’s outer circumference, while the base plate seats against the roof surface. The boot flexes with roof pitch and pipe angle, holding a constant seal through thermal expansion and wind vibration.
A good unit handles three points of failure:
- It grips the pipe with a taper, increasing pressure as the pipe shifts.
- It spreads load across the roof sheeting.
- It deflects runoff before water reaches the penetration.
Material quality counts. A cheap plastic roof vent adapter stiffens in the Highveld sun and loses that compression fit within two summers.
Common Applications in Residential and Commercial Roofs
Some plumbers in Johannesburg still hesitate to cut a neat hole for a soil stack, yet the roof vent adapter turns that penetration into a reliable entry point. On a typical residential roof, the adapter handles the sewer vent pipe, the extractor fan duct for a steamy bathroom, and the copper pipe feeding a solar geyser. Each flexes differently under the Highveld sun.
Commercial roofs demand more. A single distribution centre might run a dozen penetrations for different services. The roof vent adapter must accommodate larger diameters and steeper profiles without losing its compression grip. Common commercial uses include:
- refrigerant lines on retail centres
- gas flues on warehouse roofs
- high volume extraction ducts in factories
The cost of a failed seal is severe when the penetration sits above a server room or a production floor. A zinc and steel roofer will specify a quality adapter on every penetration, regardless of the building’s size.
Types of Roof Vent Adapters
Material Variations: Metal, Plastic, and Rubber
South African roofs endure roughly 2,500 annual hours of harsh sunlight, which punishes exposed fittings without mercy. That includes your roof vent adapter, a component many homeowners overlook until it starts leaking during summer thunderstorms.
Metal variants, usually galvanised steel or aluminium, withstand extreme heat without warping. Plastic options, typically PVC or polypropylene, offer cost relief but grow brittle under sustained Highveld UV exposure. Rubber, often EPDM, flexes around uneven tile profiles where rigid materials fail completely.
Selection factors to weigh:
– Metal: durable and fire resistant, yet prone to condensation.
– Plastic: lightweight and corrosion free, but vulnerable to cracking.
– Rubber: seals irregular gaps well, though UV checks are necessary.
Your roof vent adapter’s lifespan depends heavily on matching material to your local climate, from coastal humidity to inland dryness.
Shape and Size Configurations: Round, Square, Rectangular
Round, square, rectangular. Your roof vent adapter’s shape is not a fashion choice; it is an engineering decision. Round units mate with flexible ducting common in bathroom extractor fans. Square adapters align with rigid pipes running through timber rafters. Rectangular versions, often called transition pieces, solve mismatches when your ceiling opening and roof penetration refuse to line up.
Size matters as much as profile. Common diameters for round adapters include 100mm, 150mm, and 200mm. Square and rectangular options range from 125mm squares to elongated 300mm by 200mm transitions. Measure the spigot on your fan or cowl before buying a roof vent adapter.
Here is a quick reference for common configurations:
- Round: best for flexible ducting and curved routes.
- Square: pairs cleanly with standard roof sheeting.
- Rectangular: handles awkward retrofits where clearance is tight.
Flexible vs. Rigid Adapter Designs
Flexible roof vent adapters use corrugated sleeves that bend around joists and cables. They suit tight retrofits where a straight path is impossible. Rigid designs hold a precise angle with no flex. I prefer rigid sections for consistent airflow, since they resist deformation from heat.
The choice depends on your roof cavity. A flexible roof vent adapter handles minor misalignment quickly. A rigid roof vent adapter works better for long vertical runs where sagging creates condensation pooling points.
Common selection criteria:
- Flexible options for short bends and confined spaces.
- Rigid options for straight runs and high heat zones.
- Flexible types compress to fit unexpected gaps.
- Rigid types withstand foot traffic in accessible roof voids.
Most South African installations pair a flexible segment at the fan spigot with rigid sections near the roof penetration.
Universal Fit vs. Model-Specific Adapters
Choosing between a universal fit and a model specific roof vent adapter often comes down to precision versus patience. A universal model uses collapsible fins or rubber cones to create a seal around various pipe diameters. This makes them a popular choice for DIY enthusiasts in South Africa who might be connecting a new extractor fan to an older, existing duct. However, a universal seal is rarely perfect, and it relies heavily on the quality of the clamping mechanism.
Model specific adapters are engineered to match the exact spigot of a specific fan brand. They lock into place with a satisfying click, leaving no room for guesswork. The airflow dynamics are preserved because there is no turbulence caused by a mismatched joint. For a stringent installer, this is the gold standard. Here is a quick breakdown of the value proposition:
– Universal adapters offer versatility for multiple brands and job sites.
– Model specific units guarantee a factory perfect fit.
– Universal units are generally more affordable and easier to source locally.
– Model specific units reduce the risk of vibration noise.
Ultimately, the choice is a matter of how much tolerance you have for improvisation. While a universal roof vent adapter is a lifesaver for emergency retrofits, the specific unit is the investment in quiet, reliable operation. In the South African market, where spigot sizes vary between imported and local fans, checking your manufacturer’s spec sheet before you climb the ladder is the wise move.
Installation Guide and Best Practices
Essential Tools and Materials for Installation
Installing a roof vent adapter properly depends more on preparation than physical effort. The first hour spent checking the roof deck condition and measuring the opening will save you from costly leaks later. In South Africa, where afternoon thunderstorms arrive without warning, a rushed installation becomes a visible problem very quickly.
You will need a few essential items before you start.
- A roof vent adapter that matches your duct diameter and roof pitch
- A metal cutting disc or jigsaw with fine teeth for the hole
- Roofing sealant compatible with your roofing material
- Stainless steel screws with rubber washers
Clean the surface around the cut opening and dry it fully. Apply sealant generously under the adapter’s flange, then press it down evenly. Secure each screw without overtightening, as warped flanges create gaps. Finally, check the interior side to confirm the connection to your ductwork is airtight.
Step-by-Step Installation Process
The afternoon sun in Johannesburg hides a secret. It can turn a modest leak into a cascading waterfall within the span of a single highveld storm. Proper installation of a roof vent adapter is a ritual of precision that respects this climate. Your previous preparation of the surface matters, but the sequence of events now determines whether you hear silence or dripping in the ceiling cavity during the next downpour.
Cutting the hole is a moment of commitment. For tile roofs, slide the adapter beneath the tile course, ensuring the flange sits flush against the underlayment. For corrugated iron, position the metal cutting disc at a low angle to avoid snagging the sheet. You must measure twice and cut once, for a roof vent adapter demands absolute fidelity to its template.
The best practice sequence follows a strict order that many amateur installers ignore at their peril:
1. Position the adapter over the hole, verifying orientation against the roof pitch.
2. Apply a continuous bead of sealant to the underside of the flange, not the roof itself.
3. Lower the adapter into place, pressing firmly to spread the sealant evenly.
4. Insert all stainless steel screws in a crisscross pattern, working from the centre outward.
Screw tension is a matter of tactile judgment. The rubber washers should compress slightly, but you must stop before the metal begins to flex. A warped flange is a permanent invitation for water ingressebb. The roof vent adapter is a bridge between the interior world of warm air and the exterior realm of weather, and the bridge must stand level.
After securing the perimeter, step back and inspect the drainage path. Water will flow over the upper portion of the adapter and around the sides. If you have installed it correctly, no water will pool at the base. The final check involves climbing into the roof space and confirming the duct connection on the interior side. This is your last line of defence against the unrelenting Cape winters and the humid KwaZulu-Natal summers that test every seam.
Sealing and Waterproofing Techniques
Choosing the correct sealant determines how long the adapter survives. Polyurethane compounds handle Johannesburg’s UV index better than basic silicone, which degrades after a few highveld summers. Surface preparation goes beyond simple cleaning; acetone removes invisible oils, and a primer creates a molecular bond on painted corrugated iron or concrete tiles.
The application requires a continuous bead, laid without interruption, and the adapter must be pressed down with even pressure. Waiting for the full cure time is part of the waterproofing process. A premature exposure to rain can compromise the entire seal. Once cured, the sealant accepts the thermal expansion of metal and tile without cracking.
The roof vent adapter works silently. The sealing technique decides whether that silence lasts.
Safety Measures and Common Pitfalls to Avoid
There is a quiet satisfaction in watching rain run off a roof, especially when you know the tiny details are handled. The roof vent adapter is one of those unsung components that keeps everything dry and comfortable, but its success depends on how carefully you work around it. Getting the installation right takes more than just fastening a few screws; it requires patience and a clear eye for the job ahead.
Mistakes often happen when people rush the preparation. A dirty surface is the enemy of adhesion, so sweep away debris and dry the area completely before you begin. Apply the sealant with intention, pressing it into every gap. If you force the adapter into place without aligning it properly, you will create weak points that appear later as stubborn leaks. Take your time lining it up, and the reward is a secure fit.
Safety should always guide your movements. Working at height introduces real risks, so set up stable footing and keep your tools within easy reach. Before you climb down, inspect the entire assembly once more. These checks may seem tedious, but they protect the work you have done.
Consider these steps to keep the process smooth:
1. Wear gloves to protect your hands from sharp metal edges.
2. Clear the surrounding roof area of loose tiles or branches.
3. Measure twice before cutting any flashing.
4. Allow the sealant to cure fully before exposing it to water.
The roof vent adapter performs best when it is paired with a well-sealed base. Flashings should overlap correctly, shedding water away from the seam rather than letting it pool. If you notice a gap between the adapter and the roof surface, address it immediately. A small opening can allow moisture to travel further than you expect, damaging insulation and framing over time.
A tight seal depends on the quality of your materials and the steadiness of your hand. Cheap sealants fail quickly under the harsh South African sun, so choose a product designed for outdoor endurance. The adapter itself should fit snugly over the vent pipe, with no wobble or play. When everything settles into place, the result is a roof that breathes properly while keeping the elements outside where they belong.
Remember that the work does not end with the final screw. Recheck the adapter after the first heavy rainfall to confirm everything held. This simple habit catches small issues before they become expensive problems. A roof vent adapter, installed with care, becomes an invisible guardian of your home’s comfort for years to come.
Benefits of Using a Quality Vent Adapter
Enhanced Ventilation Efficiency and Airflow
A poorly sealed roof vent adapter does more than leak. It strangles airflow. In South African climates, where attic temperatures swing dramatically between seasons, the connection between your vent pipe and roof opening determines whether your ventilation system functions properly.
A quality roof vent adapter maintains a smooth internal bore. This reduces turbulence at the junction point. Less turbulence means air moves freely, preventing moisture buildup in ceiling cavities. You can feel the difference when you hold a hand near the vent on a hot afternoon!
The benefits show up in measurable ways:
– Consistent air exchange during high humidity coastal conditions
– Lower attic heat buildup in summer
– Reduced strain on your overall ventilation system
Every adapter I install gets tested for airflow resistance. The difference between a cheap universal fit and a precise adapter becomes obvious when you observe the air current with a smoke pencil.
Prevention of Leaks and Moisture Damage
Few things compromise a roof faster than moisture finding its way through the ventilation opening. A quality roof vent adapter creates a barrier that respects the integrity of your ceiling structure. I have seen attics where a cheap adapter allowed water to track along the trusses, leaving behind a period of quiet acquiescence as the timber slowly weakened.
The beauty of a precision-fit adapter is its predictability. It embraces the pipe circumference with a firmness that resists wind-driven rain, which is a common assault during Cape Town’s winter fronts. This peace of mind is not a luxury; it is a preventative measure against expensive rot.
The consequences of a poor seal are measured in more than just damage:
– Persistent dampness that attracts wood-boring insects
– Staining on ceilings that mars interior aesthetics
– Progressive decay of insulation materials
With a durable adapter, you eliminate these variables. The unit works continuously but invisibly, allowing you to forget the roof entirely. Nothing brings more satisfaction than inspecting a flashing joint years later and finding it as dry as the day it was fitted. That is the hallmark of true protection.
Energy Savings Through Better Insulation
The average South African household loses up to 30% of its heating or cooling energy through the roof space. A quality roof vent adapter directly addresses this issue by maintaining the integrity of your ceiling insulation. When the adapter sits flush against the pipe and the roof surface, it prevents the formation of gaps that allow conditioned air to escape into the atmosphere.
Properly sealed vents create a stable thermal boundary. The adapter acts as a plug that stops warm air from rising out of your living spaces during winter and prevents the ingress of scorching summer heat from the roof cavity. This reduces the workload on your heating and cooling systems. The result is a tangible reduction in monthly electricity bills, which matters in a country where energy costs are a constant pressure. You spend less to keep your home comfortable.
The performance of your insulation depends on its coverage. When a vent adapter is poorly fitted, it compresses or displaces the insulation material, creating a thin spot that loses its thermal resistance. A quality roof vent adapter is designed to work with your insulation, not against it. It allows you to keep the blanket of insulation intact right up to the penetration point reliable roof vent adapter options facilitate this seamless integration. In an era of load shedding and rising tariffs, the energy savings from a properly sealed vent are a practical, quiet financial win for any property owner.
Contribution to a Longer Roof Lifespan
Your roof can lose a decade of service to a wobbly vent opening. A roof vent adapter that sits flush prevents wind-driven rain from reaching the deck, the main cause of rotting rafters and corroded flashing. Every unsealed gap accelerates aging.
A quality adapter stops the surrounding structure from expanding and contracting unevenly. Temperature swings create micro fractures that turn into cracks, inviting water and pests. A proper seal keeps the thermal envelope stable.
- Prevents ponding water from accelerating corrosion of the roof sheet
- Stops debris accumulation that traps humidity against structural timber
- Keeps gnawing rodents from undermining the vent collar
Installing a roof vent adapter is a structural investment. For South African roofs facing harsh UV and storms, that small component adds years to your entire roof assembly.
Common Issues and Troubleshooting
Sizing Mismatches and Fitting Problems
A mismatched roof vent adapter is a common frustration, often discovered only after the sealant has been applied. The issue usually stems from assuming a universal fit, yet the reality involves subtle variations in both pipe diameter and roof tile profiles. When the adapter is too large, it creates a gap that no amount of sealant should bridge. When too small, it forces the flashing, leading to cracking under thermal expansion.
Before you begin, measure twice and cut once. This old adage is the best defence against a failed installation.
– Check the inner diameter against the actual vent pipe, not the old adapter’s label.
– Assess the roof tile’s curvature; a flat adapter will never sit flush on a high-heel tile profile.
– Verify the pitch of your roof. A standard adapter may fail on a steep incline.
Ultimately, a little time spent on measurement prevents the costly and labour-intensive task of removal later. Precision here ensures the integrity of your roof remains intact, avoiding potential water damage.
Cracking, Warping, or UV Degradation
Finding a cracked roof vent adapter usually means water has already found its way into places it shouldn’t be. The root cause often comes down to three trouble spots: severe weather, poor material quality, and relentless UV exposure. The sun’s rays break down the polymers in cheaper plastics, making them brittle. Then a sudden hail storm or a hot day followed by a cold snap delivers the final blow.
If you are inspecting yours after a rough season, start with this checklist:
– Look for spiderwebs or hairline fractures near the base, not just on the top cap.
– Check the flexibility of the rubber boot, if your model has one. Stiffness that cracks under pressure is a dead giveaway.
– Feel for warping. A deformed top won’t spin properly, if it spins at all, which kills ventilation efficiency.
The real problem is thermal expansion. A cheap adapter expands at a different rate than the metal pipe or the shingles around it. That constant tugging creates stress points. Once the plastic loses its UV stabilizers, it cannot absorb that movement anymore. The result is a split that opens up during the heat of the day and closes at night, acting like a pump that draws rainwater straight into your attic.
Inadequate Sealing Leading to Water Intrusion
Water intrusion often begins where the roof vent adapter meets the flashing, not at the visible dome. A seal that looks tight from a distance can fail at the seam where the rubber boot wraps around the pipe. Heat accelerates this failure. In South African summers, the adhesive softens and then re-hardens, leaving a gap that admits rain.
Common trouble spots include:
- A loose base collar that fails to hug the shingles.
- Sealant that has pulled away from the metal edge.
- Fasteners that have worked themselves loose.
Each issue produces the same outcome. Water finds the path of least resistance and travels down the vent shaft. I once inspected a unit that leaked only during driving rain, which pointed directly to a marginal seal rather than a structural break. Replacing a roof vent adapter is straightforward, but diagnosing the faulty seal requires checking every contact point.
Signs That an Adapter Needs Replacement
Roof vent adapter failures rarely announce themselves with drama. Instead, they whisper through subtle stains on ceiling plaster or a persistent mustiness in the hallway. The rubber flange, though flexible, is not immortal. It stretches, contracts, and eventually succumbs to the harsh UV rays of the South African sun. What appears to be a solid, watertight seal from the ground often hides micro-cracks that only become apparent during a heavy downpour.
The primary culprit is often the fastener base. When the plastic or rubber collar becomes brittle, it loses its grip on the pipe. This loosening creates a gap where water can pool and seep through. Other times, the issue is in the material itself.
– Cracking around the bolt holes indicates over-tightening or age-related fatigue.
– A flat, compressed appearance on the rubber suggests it has lost its memory and no longer conforms to the pipe’s shape.
– Visible granulation or chalkiness on the surface signals advanced UV degradation.
These signs might seem minor, but they allow water to bypass the adapter’s protection. The water then travels down the vent stack, saturating the insulation and rotting the wooden roof structure. It is a silent progression. What begins as a fixable gasket issue turns into a costly structural repair if ignored. The adapter is the frontier. When it fails, the entire integrity of your roof is compromised, making early detection of these physical changes the only defence against extensive water damage.
Selecting the Right Adapter for Your Roof
Key Factors: Duct Size, Roof Pitch, and Climate
A mismatched roof vent adapter can silently undermine a home’s entire breathing system, turning a simple duct connection into a source of persistent frustration. Selecting the right component is not a casual errand; it is a precise act of engineering judgment.
In South Africa, where the climate ranges from coastal humidity to highveld aridity, the stakes are raised considerably. Your duct size is the first immutable law, as a two millimeter difference can compromise the seal and the airflow it governs. The roof pitch, too, dictates the adapter’s angle and orientation, ensuring the vent cap sits parallel to the roofline rather than fighting against it. Finally, consider the local weather patterns. A region battered by seasonal downpours demands an adapter built to withstand that specific strain.
1. Measure the duct’s interior diameter precisely.
2. Match the adapter’s base flange to the roof’s slope.
3. Consider UV exposure and average rainfall for material choice.
When these variables align, the roof vent adapter performs its quiet duty, channeling moisture and stale air away from the structure. When they do not, the system whispers its failure through water stains and reduced insulation efficiency. The task is to listen before you act, ensuring the chosen piece honours the roof’s design and the climate’s demands.
Compatibility with Existing Roof Vent Systems
Every roof vent adapter must interface with what is already installed. The existing vent pipe’s condition, orientation, and termination point determine whether a simple drop-in replacement works or whether a transition piece is needed. South African homes, particularly those built in the 1980s and 1990s, often feature vent stacks with non-standard diameters and older materials that have settled.
A new adapter will not solve a problem if the underlying flange has corroded or the pipe has shifted. The connection point, not the adapter itself, typically dictates the success of the retrofit.
- Inspect the existing pipe’s rim for warping or debris.
- Check the collar depth to ensure the adapter seats fully.
- Confirm the old vent’s material to avoid galvanic corrosion.
Assessing the old mounting collar before purchasing prevents a frustrating mismatch. This inspection is straightforward but often skipped. A roof vent adapter should not be a compromise, it should be a deliberate continuation of the existing system’s design.
Top Brands and Product Recommendations
Walk into any South African hardware store and you will find a wall of shiny roof vent adapter options. The plastic packaging promises a perfect fit, yet the reality of your 1987 roof tells a different story. Local brands like Cobra and Vulcan offer solid mid range products, but the premium German and Australian imports dominate contractor conversations for good reason. The difference lies in polymer quality and the precision of the moulded collar. A cheap adapter will deform under a Karoo summer sun faster than you can mix the sealant.
The selection process should start with your specific roof sheet profile. The seam lock and crest widths on IBR or Corrugated iron dictate which adapter base sits flush. A universal rubber adapter appears flexible, but it often gaps on sharper profiles. Stick with branded options that explicitly list your sheet type. The American brands rarely accommodate our metric purlins and unique ridge caps, so check that spec sheet before committing.
When evaluating products, consider the gasket material and the locking mechanism.
– Does the adapter use EPDM rubber or a cheaper PVC foam? EPDM handles our UV levels with grace.
– Examine the clamp ring. A stainless steel ring will outlast a galvanised one by a decade.
– Check if replacement seals are available locally. Some imported units require ordering parts from Frankfurt.
– Look at the base thickness. A flimsy base will crack at the fastener points.
The most expensive unit is not always the best fit for your situation. A roof vent adapter for a simple turbine vent requires less structural support than one for a solar extraction fan. Consider the weight of your chosen vent and the wind uplift it will experience on a Highveld thunderstorm. Define the adapter as a system component, not just a plastic ring. Measure your existing pipe, buy for the brand that supports the full system, and use generous sealant for a permanent fix. The product is only as good as the preparation over which it sits.
Budget Considerations and Long-Term Value
Selecting the right roof vent adapter often comes down to a simple choice between short-term savings and long-term peace of mind. A budget-friendly unit might cost you R150 today, but a poor seal can lead to ceiling stains and rotting timber within a single rainy season. A quality adapter, although more expensive upfront, represents a small investment compared to the cost of internal water damage.
The difference usually lies in the material and construction. A cheap plastic roof vent adapter is prone to cracking and warping under harsh UV rays, while a unit with a higher rubber content remains flexible and resilient for decades. You might save a few rand on the initial purchase, but you will likely spend far more on replacement parts and sealant over the years.
Consider the metal components as well. A standard galvanised clamp ring will corrode over time, but a stainless steel version will maintain its integrity for years. Attempting to force a mismatched adapter onto a warped base also risks cross-threading the fasteners, leaving you with a loose fit that no amount of silicone can fix.
While a premium roof vent adapter costs more, it usually comes with a longer service life and fewer maintenance headaches. Think of it this way: a cheap unit might last five years, whereas a quality one can easily last twenty. When you break down that cost, the premium option often proves to be the more economical choice. The real expense isn’t the product; it’s the potential water damage to your roof structure if you choose incorrectly.


0 Comments