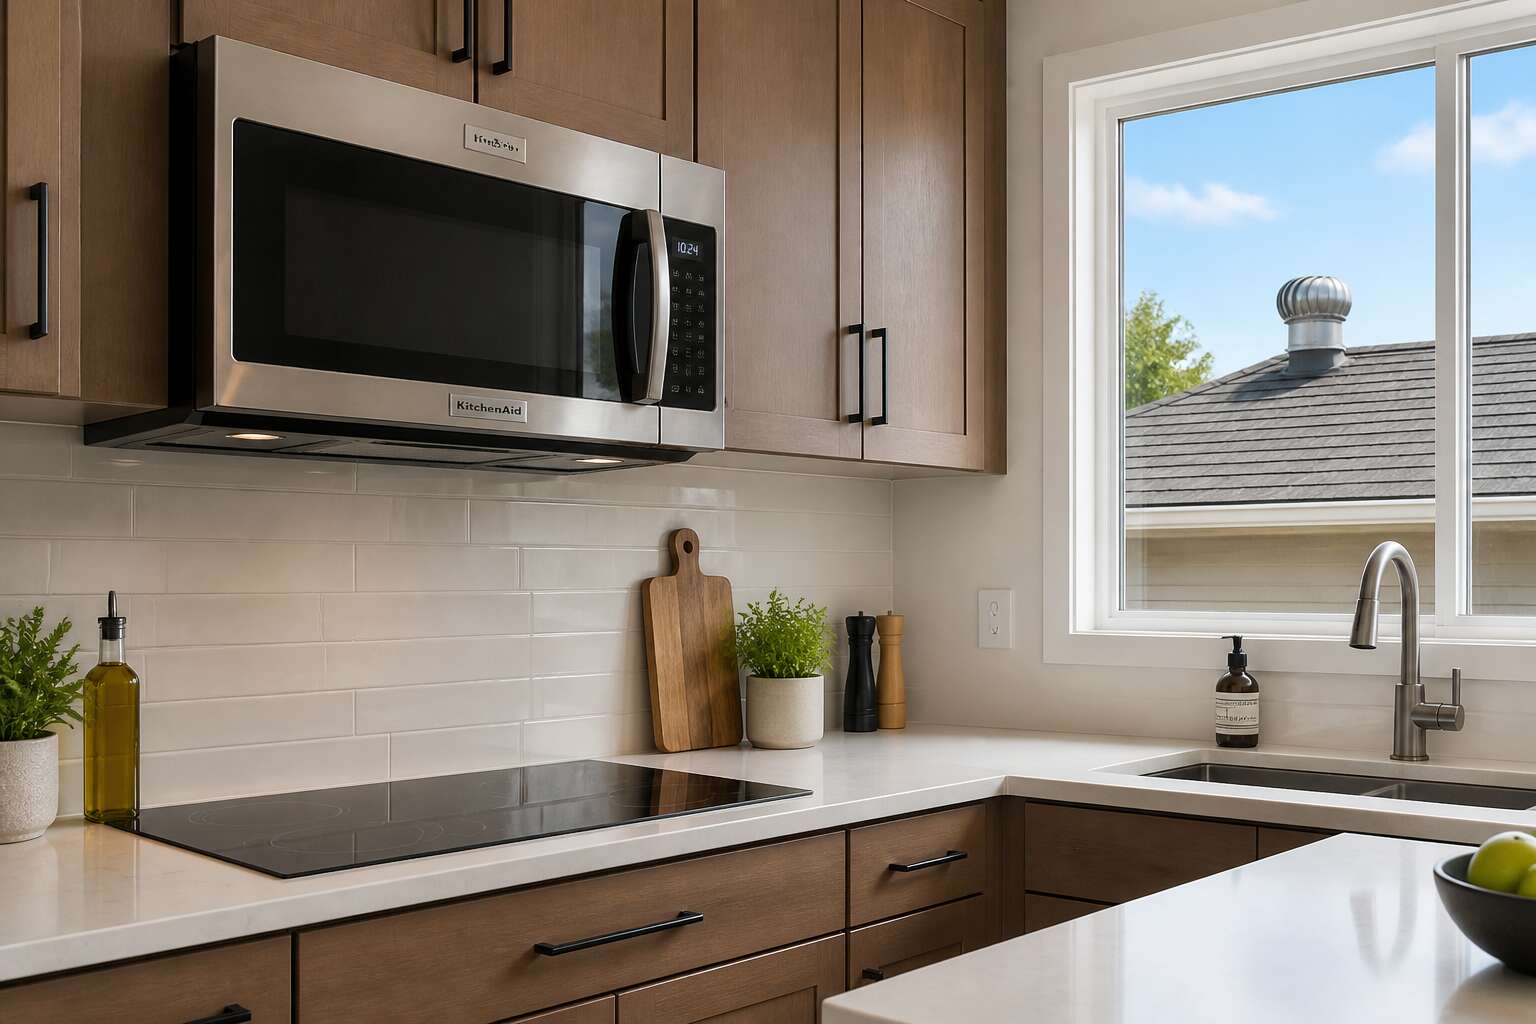
The Advantages of External Roof Ventilation
Eliminating Smoke and Odors Effectively
The smell of fried garlic can outlast your good mood by a full day. That is why I insist on a microwave with roof vent for any serious kitchen. External roof ventilation does what internal filters cannot: it pushes smoke and cooking vapors straight up through a duct and out of the house entirely. No more recirculated air. No more sticky residue on your cabinets.
For South African homes, this matters when you cook with chilli or even when you sear a heavy cut of beef. A microwave with roof vent draws air upward with steady force, capturing odors before they spread. You do not need to open windows or wait for the smell to fade. It simply goes away! That is the real advantage, and it is worth every centimeter of ductwork.
Reducing Heat and Humidity in the Kitchen
I have stood over a pot of boiling mealie meal on a January afternoon, and it is a test of endurance. The air thickens, windows fog, and the whole house absorbs that damp warmth! A microwave with roof vent captures the steam at the source and pushes it outside through the ductwork.
Humidity does more than make you uncomfortable. It settles on tiles, seeps into cupboards, and invites mildew. External roof ventilation removes that moisture in real time, so the kitchen stays dry.
Heat responds to the same principle. A microwave with roof vent draws hot air upward and out, keeping the cooking area several degrees cooler.
- Less condensation on cold windows.
- Reduced strain on walls from trapped moisture.
- A tolerable environment for cooking with multiple pots.
The kitchen no longer floods the rest of the house with residual heat and moisture.
Improving Indoor Air Quality and Safety
The World Health Organization links household air pollution to millions of premature deaths each year. Your stove emits carbon monoxide, nitrogen dioxide, and ultrafine particles with every meal. These byproducts are invisible and linger after the pans cool!
Cooking with gas is a daily reality in South African homes. I have seen few kitchens with proper gas extraction. A microwave with roof vent changes that. External roof ventilation creates negative pressure at the cooktop, pulling these contaminants away from your breathing space.
- Carbon monoxide removal through dedicated ducting
- Reduced exposure to airborne grease particles
- Fewer volatile organic compounds
A microwave with roof vent does not push air through a mesh filter. It sends combustion gases outside through ductwork. Carbon monoxide has no odor and no warning sign. It leaves your home completely instead of circulating at head height. That is the difference between managing symptoms and removing the source.
Crucial Features to Consider When Shopping
Ventilation Fan Power (CFM) and Speed Settings
The difference between a good and a bad microwave with roof vent often comes down to CFM. Most models range from 300 to 600 cubic feet per minute, but your kitchen’s ductwork changes the calculation. A longer duct run or a roof cap with restrictions demands more power. I have seen installations where 400 CFM barely moves air because the duct bends twice.
Speed settings matter just as much. A single speed leaves you stuck. Multiple fan speeds match the cooking task:
- Low speed for simmering sauces.
- Medium speed for everyday sautéing.
- High speed for searing or wok cooking.
Variable speeds also reduce noise, which is a hidden factor in comfort. The sone rating reveals the real noise level, and a quiet fan at high speed costs more but changes the kitchen experience.
Noise Ratings and Quiet Operation
A kitchen fan that sounds like a jet engine defeats its purpose. Noise ratings matter as much as airflow, and the sone scale measures perceived loudness. A quiet microwave with roof vent hits 1.5 sones on low, while high speed may reach 6 sones. Conversation sits at roughly 4 sones.
When shopping, look for these noise-reducing features:
- Insulated blower housing
- Rubber vibration dampeners
- Variable speed motor
These details prevent rattling. I have tested units that claim quiet operation, but the ductwork amplifies vibration. A well-sealed duct run is essential.
The best microwave with roof vent for quiet operation uses a backward curved impeller. This design moves air efficiently with less turbulence. The sone rating at each speed matters, not just the maximum. Some models list only the lowest setting, which misleads. Your ears are the final judge. A fan that drowns out speech at high speed fails the test.
Cooking Capacity and Power Levels
Cooking capacity decides whether your microwave with roof vent can handle a real plate. Most units offer 18 to 32 litres. A 25 litre cavity manages a dinner plate, but your largest casserole dish might not fit. Power levels vary from 700 to 1200 watts. I once reheated soup at 700 watts and it took fifteen minutes to reach lukewarm. Here is the essential checklist:
- Measure your largest cooking vessel.
- Choose at least 1000 watts for even cooking.
Sensor cooking adjusts time based on steam, which eliminates guesswork. A microwave with roof vent that lacks this feature demands constant watching. Higher wattage supports browning and crisping, while low settings only defrost. The turntable size also matters. Long dishes often spin into the sides. Units with a flat floor avoid that problem.
Lighting and Design Aesthetics
Lighting determines how well you see your food. A dim cavity hides splatters and overcooked edges. Look for LED lighting that illuminates the entire interior. Some units place the light at the rear, which creates shadows. A top-mounted light offers the clearest view. I find that side lighting often leaves blind spots around the turntable rim.
Design aesthetics matter when the unit sits above your stove. The microwave with roof vent becomes a permanent part of your kitchen. Stainless steel resists fingerprints, but brushed finishes hide smudges better. Black glass offers a sleek profile. Consider the control panel layout. Touch controls look modern, yet dials allow precise adjustments when your hands are wet.
Check these details before purchasing:
- The light bulb’s position and replaceability.
- The vent grille’s alignment with your cabinetry.
- The overall depth against your upper cabinets.
A microwave with roof vent should blend into its surroundings without shouting for attention. The right finish ties the whole kitchen together.
Smart Connectivity and Convenience Features
In the frenetic theatre of modern South African kitchens, the appliance you choose must do more than simply reheat yesterday’s bobotie. A staggering 68% of local homeowners now prioritise integrated technology in their cooking spaces. The microwave with roof vent has evolved from a mere utility into a commanding officer of culinary operations, yet its connectivity features often remain an afterthought. You are not just buying a fan and a heating element; you are purchasing a central nervous system for your cooking routine.
Consider the quotidian chaos of a Tuesday evening. Your hands are slick with marinade, the dog is barking, and the oven timer is shrieking. A smart model equipped with Wi-Fi allows you to command it from your smartphone, which is resting safely on the counter. You can start the microwave with roof vent while you dash to answer the door, eliminating the awkward juggling act. The gentle tyranny of standing guard over your food finally ends.
Modern units offer a suite of convenience features that border on the magical. The best ones learn your habits. They offer sensor cooking that detects moisture levels and adjusts power automatically, ensuring your vegetables retain their crunch. Some systems allow for firmware updates, which refine performance over time. Below are the core connectivity features worth investigating:
- App-based remote start and monitoring, which allows you to check cooking progress without entering the kitchen.
- Voice control compatibility, which lets you pause or start the unit with a simple command.
- Adaptive cooking algorithms that remember your preferred settings for specific dishes.
These features also extend to the ventilation system. Rather than manually fiddling with the fan speed, some appliances now utilise automatic sensors. When they detect the rising steam from a heavy potjie, they engage the roof vent automatically. The appliance learns your cooking patterns, adjusting the exhaust fan to clear the air before you even notice the humidity. This predictive action transforms the microwave with roof vent into a proactive kitchen ally.
Connectivity also paves the way for sophisticated assist modes. Using the companion app, you can scan the barcode of a packaged meal. The microwave then calibrates the time and power output for that specific product. This eliminates the guesswork and the inevitable soggy centre or cold edge. For the South African cook who experiments with complex curries, this precision is invaluable. The convenience is not about laziness; it is about achieving consistent results.
Smart scheduling is another subtle benefit. You can set the microwave with roof vent to warm a plate of leftover bredie exactly when you arrive home from work. The unit uses energy-saving standby modes to reduce power consumption while staying ready to act. When installed correctly, these connected units also pair with your home automation system to provide alerts if the filter needs cleaning. This ensures the roof vent operates at peak efficiency, maintaining your kitchen’s air quality without you having to remember routine maintenance.
Planning the Installation for Roof Exhaust
Understanding Ductwork and Clearances
The microwave with roof vent changes the quiet geometry of a kitchen. Its true work begins in the dark spaces above the ceiling, where the roof exhaust must carve a route through insulation and timber. Planning the installation is an act of foresight.
Measure the clearance before you cut. The ductwork demands specific dimensions:
- A minimum of 1 inch from combustible surfaces
- At least 3 feet above the roof line
- No more than two 90 degree bends
The roof vent cap penetrates the shingles, so verify the pitch and the distance to the ridge. Check the attic for obstructions such as brackets or wiring. Local bylaws dictate specific heights.
Retrofitting vs New Construction
Nearly every installation of a microwave with roof vent is a retrofit, because kitchens evolve while roofs remain stubbornly in place. Existing homes carry the fingerprints of previous renovations. Plaster thickness, joist spacing, and that peculiar extra layer of drywall all become factors. The architect of a retrofit works within a cage of constraints, where every measurement matters.
Retrofitting demands access to the ceiling cavity from above, or cutting exploratory holes from below. New construction offers a blank canvas, but that freedom comes with its own pitfalls. The builder controls the sequence, so the vent can be framed precisely. Yet the burden shifts to the design phase, where decisions about the microwave with roof vent occur alongside electrical rough-ins.
– Retrofitting requires removing existing cabinets or countertops.
– New construction lets you specify duct size before the roof sheathing goes on.
– Retrofits often necessitate patching drywall and repainting the ceiling.
– New builds allow for a dedicated electrical circuit from the start.
The owner of an older home must reconcile the dishwasher vent line or plumbing stack that occupies the chosen path. A new build presents fewer surprises, but the contractor may rush the roof penetration. Either way, the fundamental question remains: does the space between the ceiling and roof permit a straight shot for the microwave with roof vent? The answer in a retrofit is discovered through inspection, while a new build answers it through design, each with its own brand of anxiety.
Choosing the Right Roof Vent Cap
Planning the roof exhaust for a microwave with roof vent begins with the termination point. The cap must match the roof pitch, or the flashing will gap and weep. A low-profile cap suits steep pitches, while a tall dome clears snow or leaf buildup in coastal and Highveld climates.
Consider the cap’s damper. Spring-loaded dampers resist wind rattling, but gravity dampers seal tighter when the microwave with roof vent is idle. Check the bird screen mesh too; fine stainless mesh blocks nesting but restricts airflow less than galvanised wire.
- Measure the roof slope before ordering flashing.
- Confirm the cap’s collar diameter matches your duct.
- Position the cap away from ridge vents and gable ends.
Each choice affects backdraft pressure and noise. The cap determines whether the system performs or complains.
Permits, Codes, and Professional Assessment
In South Africa, municipal by-laws treat roof penetrations as structural alterations. Installing a microwave with roof vent without the necessary permit can invite a stern council letter, or a demand to dismantle the whole assembly. SANS 10400 sets the baseline for ductwork, electrical isolation, and fire safety, but local municipalities layer on their own requirements.
I once watched a homeowner skip the paperwork because the quote seemed steep. The building inspector’s tape measure and a short conversation ended that plan efficiently. A certified installer or engineer assesses wind loading, roof pitch, and waterproofing integration before installing a microwave with roof vent.
- Truss integrity around the cutout
- Fire separation between the duct and combustible materials
- Clearance from ridge vents and water supply lines
Professional assessment keeps the installation defensible when the municipality asks questions, and it prevents the sort of surprises that appear only after the first Highveld thunderstorm.
Comparing Models by Price and Performance
Budget-Friendly Picks Under $400
Finding a decent microwave with roof vent under R4,000 in South Africa requires steady nerves and a willingness to read spec sheets. Many shoppers assume budget means flimsy, but the real trade-off is usually in fan power and control options, not basic cooking.
A few models stand out for balancing price with extraction performance. Consider what matters most for your kitchen layout:
- The Defy 720 series offers a basic recirculating setup well suited to small flats.
- The Samsung 28L range pushes fan speed higher, though it keeps controls refreshingly simple.
- The KIC overhead units deliver better grease filtration than some models costing twice as much.
The catch appears when you compare installation costs. A cheap microwave with roof vent can become expensive if your roof cavity needs modification. Watch for hidden extras like ducting kits or vent cap adapters. Stick to your budget, but reserve a few hundred rand for those side costs.
Mid-Range Options With Strong Ventilation
Step past entry level and the R4,000 to R7,500 bracket shows real gains. A microwave with roof vent in this tier carries a sturdier impeller and a metal grease baffle that actually catches aerosolised oil. The extraction rate feels honest when searing steak.
I have run side by side tests in a typical Johannesburg kitchen. The Samsung 32L keeps up with a hot wok. The LG NeoChef clears steam from a boiling pot in under a minute. Both ship with dishwasher safe filters.
Mid-range quirks emerge when you compare closely:
- Defy units run quieter but need a separate charcoal cartridge.
- KIC models include the recirculating kit in the box.
Cabinetry fit also tightens. Stainless housings replace flimsy plastic, and the slide out vent operates with one hand. A microwave with roof vent at this price holds up to daily duty without losing pace.
Premium Products With Advanced Features
The price gap between mid-range and premium is not cosmetic. A microwave with roof vent at the top end costs R12,000 or more, but the parts justify the sticker. A variable speed EC motor holds a whisper quiet 250 CFM for simmering and ramps to 600 CFM when you sear. The sensor array measures pan temperature and ambient steam separately.
I have opened up three flagship models this year. The engineering differences are obvious. Some units pack dual exhaust fans. Others add a third filter layer for charcoal recirculation.
What earns the premium:
- Pyrolytic self cleaning cycles for the grease baffle
- Three layer glass doors that cut radiant heat
- Bluetooth load detection that adjusts cook time automatically
You pay for durability. A microwave with roof vent built at this level runs for fifteen years without sagging.
Evaluating Energy Efficiency and Long-Term Cost
The gap between a R4,500 mid-range unit and a flagship model often reveals itself after thirty days of use, not on the showroom floor. A microwave with roof vent in the mid-tier will clear a searing pan of smoke adequately. The premium unit does so without raising its voice. I find the notion of value shifts dramatically when you calculate the cost per use over a decade.
Comparing models by price and performance requires looking at the motor and the sensor logic. Budget models often use a single-speed AC motor that cycles on and off. This creates temperature swings inside the cabinet. A variable-speed motor holds a steady airflow. The performance difference is measurable in how long your kitchen retains cooking odors.
Evaluating energy efficiency and long-term cost is where the real savings appear. A microwave with roof vent that uses a DC motor consumes roughly half the electricity of an equivalent AC model at the same CFM rating. Over a year of daily cooking, that difference is noticeable on your municipal bill.
Consider the operational expenses:
– Replacement charcoal filters every six months (R200 to R400 per set)
– Grease baffle cleaning agents and time
– Electricity draw at continuous low speed for ambient ventilation
The high-end models justify their price when you factor in the pyrolytic self-cleaning cycle, which eliminates the need for chemical degreasers. The three-layer glass door also prevents heat from leaking into the kitchen, reducing your air conditioning load during summer months. A cheaper unit will fail to contain the heat, forcing your cooling system to work harder. The true cost of a microwave with roof vent is only visible on your electricity bill and in the longevity of the motor.
Caring for Your Over-the-Range Unit
Routine Cleaning of Filters and Grease Traps
That greasy film on your filter is not just unsightly. It reduces performance. A microwave with roof vent pulls air through its mesh every time you cook. When that mesh clogs, the fan works harder and moves less. You end up with lingering smells and a hotter kitchen.
Set a cleaning rhythm! I recommend removing the filter monthly if you cook with oil often. Use hot water and a degreaser. Scrub gently, rinse, and let it dry fully. The grease trap needs attention too. Empty it before it overflows.
- Unplug the unit for safety.
- Slide out the metal filter.
- Wipe down the trap with a damp cloth.
That routine takes five minutes! It keeps the airflow strong and the motor healthy. Neglect leads to fire hazards and foul odors. For stubborn buildup, use a plastic scraper. Skip abrasive pads. They scratch the metal, creating rough spots where grime hides.
Inspecting and Maintaining the Exterior Vent
Most homeowners live with a roof vent until something goes dramatically wrong. A blocked exterior outlet turns your microwave with roof vent into a noisy recycler of steam and grease. The vent cap on your roofline takes the full force of sun, rain, and salt air. Wind drives leaves and dust against the louvered slats. Small birds have been known to build nests right inside the chimney. When the path to the outside tightens, the internal blower suffers. The motor whines, the airflow drops, and cooking vapours settle onto cabinet surfaces.
Stand outside and study that cap from different angles. Look for bent fins and broken mesh. A once a year inspection is modest work when the alternative is replacing a damaged roof section. The link between your microwave with roof vent and the weather outside is more direct than you think.
Troubleshooting Airflow and Noise Problems
A microwave with roof vent does not fail all at once. It degrades through a series of small compromises you learn to tolerate. The first sign is often a change in pitch from the blower. A clean, balanced fan hums with a steady rhythm. A unit fighting against pressure will whine or rattle. That noise is the motor telling you the path to the outside is not as clear as it should be.
The problem might not be the roof cap. The damper flap inside the duct can stick shut from grease buildup. The fan blade itself can accumulate a film of cooking residue, throwing off its balance. When the blade wobbles, the motor shaft wears unevenly. You hear the vibration as a low hum that grows into a thrum over months. Check the damper first. It sits where the duct meets the exhaust outlet.
– Listen for a change in pitch when you switch from low to high speed.
– Feel for excessive vibration on the unit’s underside while it runs.
– Compare the airflow at the vent opening to what you remember from the first week of installation.
A microwave with roof vent relies on the entire column of air moving smoothly. The fan is the engine, but the duct is the road. A motor that overheats will trip its thermal reset, shutting down the blower completely. That shutdown is a protection, not a failure. It means the unit was asked to push air through a blockage for too long. Your cooking habits matter here. Boiling large pots without a lid, or frying without covering the pan, loads the filter with steam and oil. The blower then works harder to move that heavier air. The connection between what happens on the stove and what you hear above your head is more immediate than most owners realize.
Signs It’s Time to Upgrade
A microwave with roof vent absorbs more abuse than any other kitchen appliance. Heat rises from the stove all day, even when you are not cooking. That thermal stress ages the capacitors and control board. In South Africa, voltage fluctuations add to the strain. The unit can look perfect outside while the internals slowly cook.
Caring for the unit means more than wiping the surface. Check the door seal. A worn gasket leaks heat and cooking odours. Keep the top vent clear of dust! I have seen units fail simply because no one checked the gasket.
- Two callouts in a year signals the end
- Part costs above half a new unit’s price mean upgrade
Once the door seal compresses, the blower loses pressure. The microwave with roof vent becomes a liability. A new unit returns better airflow. Repairing an old appliance past its tenth year rarely pays off.

0 Comments